I almost trashed this cabinet … but with a little trial and error it is now one of my favorite pieces – come see my Ikea cabinet hack using shiplap!

Who here has purchased a piece of Ikea furniture? We have one IKEA piece and it has served us well for many years. But recently, Mark and I gave our “not-so-little” IKEA cabinet a ‘facelift” of sorts. But before I explain how we did it, let me tell you why we brought this beast of a cabinet home in the first place.
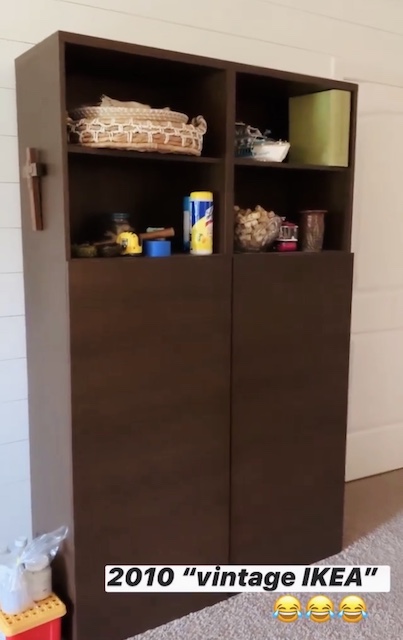
Back in 2010, when we were living in our very small first house, Mark and I converted the dining room into a kids play area. With 3 very young little ones (ages 5, 2 1/2, and new born), we weren’t doing a whole lot of entertaining or decorating. We were basically in survival mode. Back then though, one thing was for sure, we did have a whole lot of toys! At times it felt like we had our very own TOYS R US. The toys were getting out of hand and I wanted somewhere to put all of the things – this cabinet fit the need and the budget at the time.
Fast forward a few years later and we still have this cabinet. It has been sitting upstairs in our bonus room since we moved into our new home … and we still use it. The Ikea cabinet really does have a ton of storage and it is very useful – but I have never ‘liked it.’ So, last year (after shiplapping the entire bonus room), we decided to do try to ‘update’ the Ikea cabinet.
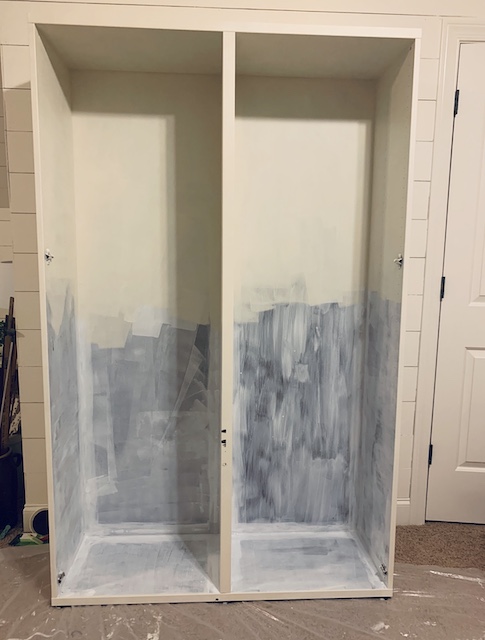
My first attempt at improving the cabinet was to paint it. Oh my word – let’s just say it did NOT work. No matter what I tried, the primer and paint seems to scratch off. I tried everything but I just couldn’t get the paint to stick. It was so very frustrating. After many attempts, and after trying many products, I basically threw in the towel. I had decided that there was no way to salvage this mess and I was ready to simply donate the Ikea cabinet to the nearest thrift shop. Until …. My friend Rob suggested that we try to shiplap the cabinet. Say WHAT???
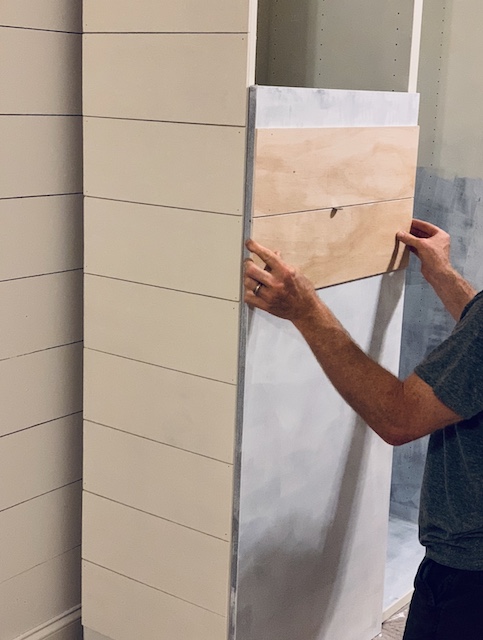
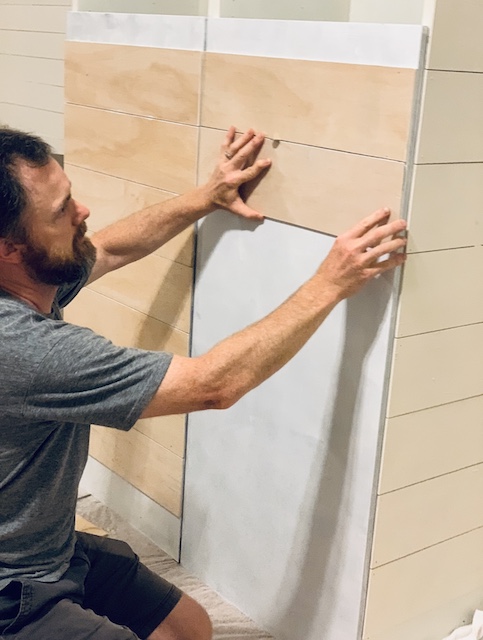
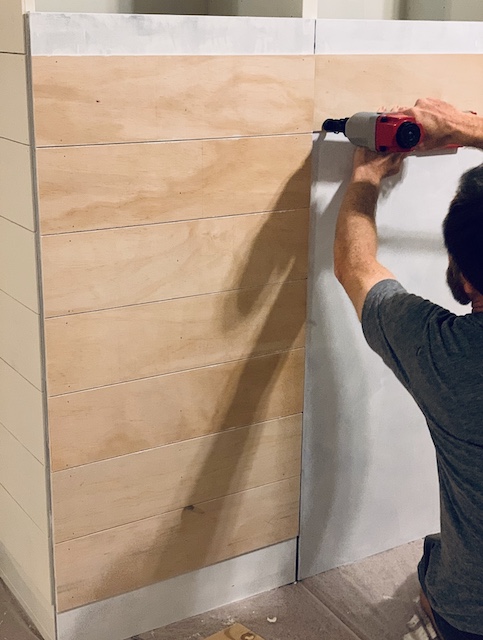
My friend suggested using thin plywood boards to shiplap the cabinet in an attempt to match the walls. He suggested we shoot for almost a “built-in” effect. I was worried it wouldn’t work but Mark reminded me that if we destroyed the cabinet while trying to shiplap it that it would be no big deal – since we were planning on getting rid of it (at that point) anyway!! You guys – I was about to try my very first Ikea hack using shiplap!
It was a great idea but mapping out the ‘plan’ presented some challenges. First, Mark to get the saw, nail guns and paint back out – YIKES – we had literally JUST finished shiplapping a bonus room over the three car garage …. but luckily Mark was on board. Second, I really wanted to shiplap “lines” to line up with the shiplap on the wall and we weren’t sure that we could make that happen. It was worth a shot. Lastly, I was worried it would just look weird. I had not seen a shiplap cabinet before. I was worried we would go through all of the effort and then I would hate it. But – we decided to just go for it. I sure am glad that we did.
Here are the steps we followed for our Ikea cabinet hack using shiplap.
Step One – Shiplap
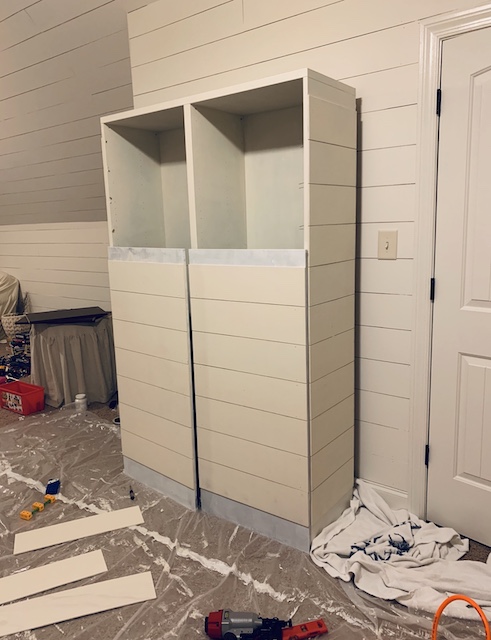
We really wanted the rows of shiplap on the cabinet to line up with the boards that were on the wall. Our goal was to make the cabinet look (almost!) like it was built-in and we shiplapped around it. Measuring proved difficult so we did the next best thing and just put the cabinet against the wall! This solved all our issues with trying to make the boards on the wall and cabinet line up. Starting near the top, we added boards to the sides of the cabinet. The bottom and top needed some trimming to fit perfectly. Once the sides were complete, we continued around the front of the cabinet and covered the doors with shiplap. One tip – use nails of the correct length. We found that the nails in our nail gun were longer than needed. This resulted in a little extra clean up on the inside of the cabinet. (We had to cut the nails down and then sand them.)
Step Two – Paint Prep Work

After we finished adding the boards to the sides and doors of the cabinet, we prepared for primer. Since the nails were too long, we needed to cut off the excess. Also, there were a few spots that needed patching because of the damage from the nails. We then removed all of the doors and shelves from cabinet. All pieces were laid out on the bonus room floor so we had ample space to paint.
While we shiplapped as much as we could, there were a few small areas that did not get shiplap added. The very back area of the two shelves up towards the top of the cabinet and the inside sides of the shelves. (We also did not shiplap areas that wouldn’t be seen – for example, the very top of the cabinet, the inside, the bottom, etc..)
We washed and sanded the areas of veneer. The sanding was a light rough-up to help remove the finish and give the paint something to stick to.
Step Three – Primer
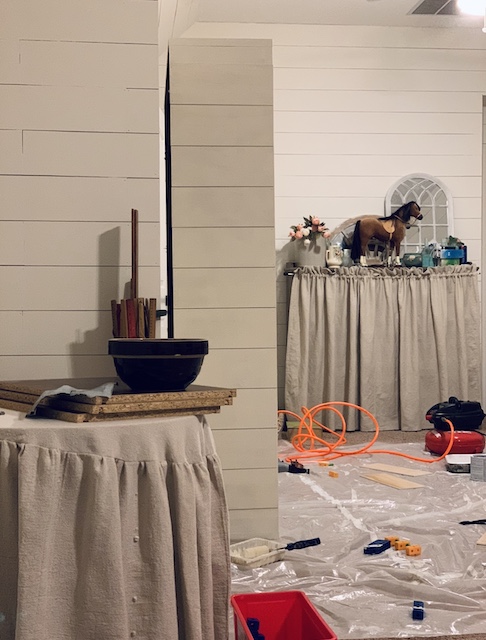
Priming is always needed when moving from a dark color to a light color. In this case, we also needed a strong finish to help ensure the topcoats of paint would adhere. We used XXXX since the label said it was good for this purpose. We found that two coats were best since the first coat didn’t go on as well as we had hoped. Letting the coats dry fully in also important. Since we needed a good base for the paint to adhere to, ensuring the primer was liberally applied and fully dry was important. We did this on both the shiplap areas and the veneer areas. We used a small paint brush to get in the cracks between the shiplap.
Step Four -Painting
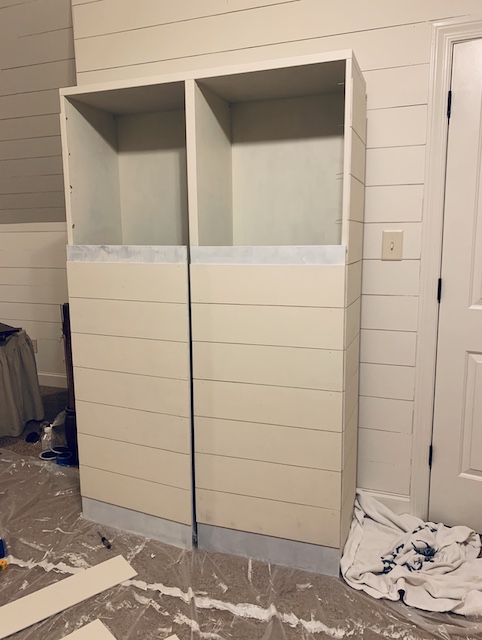
After waiting for the primer to fully dry, we moved forward with painting the cabinet. Luckily, we had extra paint after we completed our bonus room, and since we wanted the cabinet to match the walls, this was a double bonus! We used the color White Dove by Benjamin Moore. We brushed most of the paint but the larger sections could have been done with a roller. We used two coats of the wall paint since we were nervous about the paint sticking to the veneer. It also help seal the shiplap that we put on the outside of the cabinet.
Step Five – Sealing
It should come as no surprise that as we finished the cabinet I knew the open shelves would become a staging area for me. Unfortunately, that is the area that has exposed veneer so I wanted to find a really strong sealer to use on those exposed areas. I just really wanted to do all that I could to avoid accidentally scratching the paint off the veneer. So, we sealed all of the shelves on the cabinet. (We weren’t as concerned about sealing the shiplapped areas.). We used Miss Mustard Seeds Tough Coat to seal the paint. The shiplapped areas got one coat of Tough Coat and the veneer areas got four! I’ve used this on other projects and think it’s the best sealant around.
Step Six – Curing
Ok, this isn’t really another step but something we wanted to reiterate. We did have some issues with the paint sticking to the veneer. But in the end, when we left the paint to dry and cure, we found that it created a solid finish that kept the paint from scratching off. Letting each coat of paint cure helps this process. It may add a day (or two or three) to the project but we felt it resulted in a more durable finish.
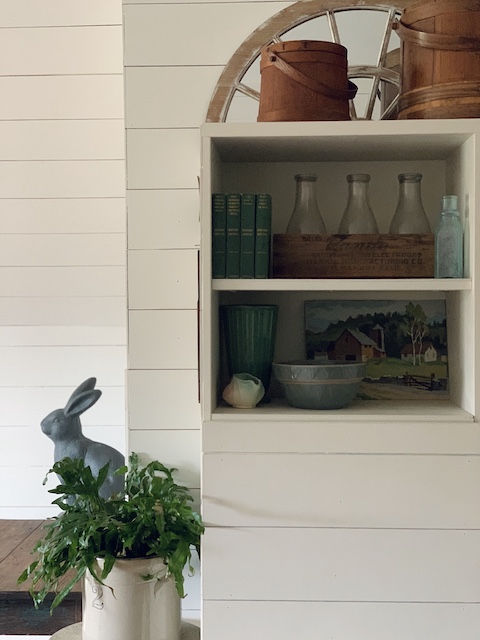
Notice: We did not add hardware. There was no hardware on the piece originally and we preferred it without even after adding the shiplap. I do think some nice large brass handles would be nice too though!
Wrap Up
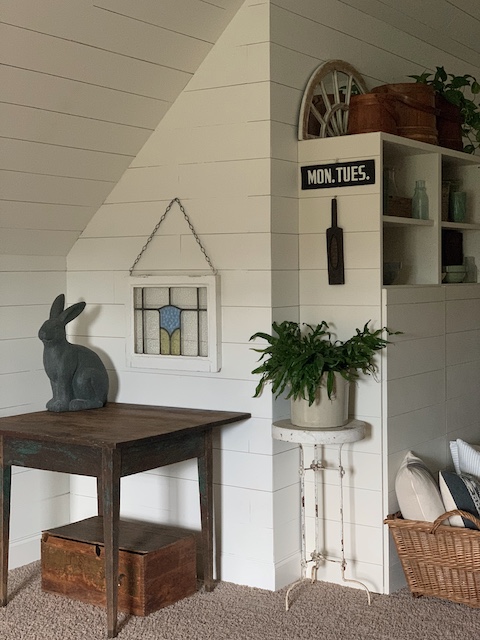
In the end, we were totally thrilled with how it turned out. The outcome of this Ikea cabinet hack using shiplap was worth all of the challenges and headaches. There was defiantly a point where I wanted to give up, but a little trial and error got us through it. I truly am pleased with the way it turned out. A little tip for ya: the next time you have a piece of furniture (old or new) that may not match your style, maybe just add a little shiplap!



*this post contains affiliate links
 Simple Dollar Tree Ghost Transformation
 How To Build A Birdhouse With Scrap Wood
 Top 5 Blog Posts Of 2021: Fridays At 5:00
 Board and Batten DIY: Our Easy Bedroom Guide


So glad that you posted the process! I remember the struggle, but also how it was totally worth it! Hopefully this will help and inspire someone before they throw away an old piece!
Love,
Leslie
@atticpatina
You are so awesome – yes, I shared the process and now it is documented to live on forever – Ha!!!! See you soon my friend!
Emily, this is a great upcycle! I love that you took the time to line up the boards creating that built in look! Well done my friend!
Oh man – that means a whole lot coming from YOU! Thanks for taking the time to check it out.