Do you want to try your hand at board and batten but don’t know where to begin? Our board and batten DIY experience may just help you out!
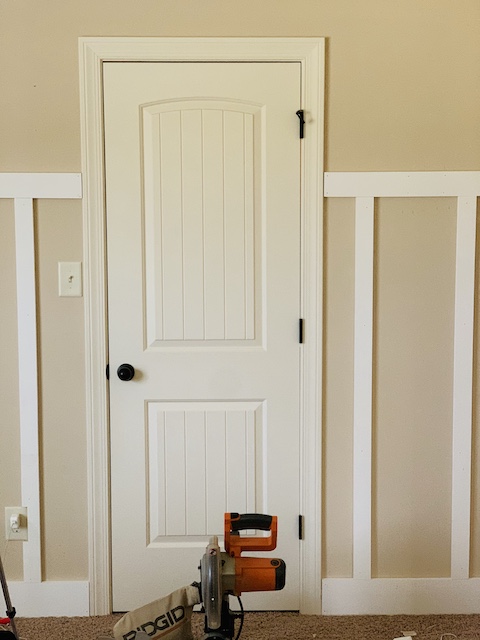
As you’ve seen throughout our home, we’ve done plenty of shiplap. We certainly have the experience hanging long, horizontal boards, so we felt it was time to try something new. Board and batten, vertical boards with a top molding, is a design feature that we have long liked and wanted to incorporate into our home. We felt adding board and batten would be a nice contrast to some of our other projects and that it would give us a chance to try something new. After reading about our board and batten DIY experience, I hope you too will feel confident to try it in your home (if you haven’t already)!
Planning & Thinking It Through
With board and batten we faced the dual challenge of “Where the heck can I do it?” and “How the heck do I do it?”. The first issue of WHERE has to do with our open first floor. There isn’t a single room on our first floor given our open floorplan and there isn’t an accent wall that could be used without it looking forced. Since we had seen board and batten on entryways, mudrooms, dining rooms, we were stuck thinking it was a first floor upgrade. Even as we worked through our progression of room updates – first floor paint, Cooper’s shiplap accent wall, the master bedroom and bonus room shiplap, Rhenna’s wallpaper accent – board and batten was always an option but never seemed to work. Then we reached Porter’s room – a bedroom with 5 doors and a large double window. Porter wanted a makeover unique to him (i.e. not shiplap) and wanted options for displaying his treasures. As we looked at his room, we could envision the board and batten and decided to run with it.
The next challenge was the HOW. How do you evenly space the battens around the room? How high should we put the top piece? How do you attach battens if the vertical boards don’t line up with the studs? Is my level really accurate? After looking at how-to guides and watching videos, soon most of the stressed melted away. A little planning, diagraming and coffee helped to alleviate the fear and get us moving. The HOW can be a blocker on any project and this was certainly the case here. As I have found, any positive attitude and creative idea can be tempered by the question of HOW – so don’t let the HOW get in your way.
The planning and diagramming went quickly after a piece of advice we found – don’t try to measure the entire room when spacing your battens. Only measure each section of open wall. Super simple logic but something that the HOW prevented us from seeing. We originally measured all the wall space and struggled with how to determine how to evenly space the battens. No matter how we spaced it out, we would invariably hit a door frame or window.
BUT – measuring just the open section of wall space allowed for more flexibility in spacing. Most of the battens are spaced 12” apart, but on walls with two doors Mark and I adjusted the spacing. So, throughout the room battens range between 11 – 12.5” based on need. This is a minor adjustment that has a big impact in solving spacing.
Materials
- 1×4 (top board)
- 1×3 (batten)
- 1×2 (cap on top board)
- Caulk
- Wood Filler
- Liquid Nails
- Paint
This was the starting point for our materials for this board and batten DIY project. Based on our measurements, we were able to get the needed wood from Home Depot already primed. We recommend getting the primed wood as it saves a lot of time while painting. Once we got started, I had to add 1×5 board to the materials list because we needed to replace our baseboards. We knew board and batten would not match the trim on the doors and window perfectly, but we did not want to replace all the trim. Unfortunately, the existing trim in the room had a tapered design so when the 1×3 batten met the baseboard trim it left a gap that just would not work – so the baseboards had to go.
Tools:
- Miter saw
- Nail gun and compressor
- Stud finder
- Level
- Tape measurer
- Paint brushes, rollers
- Tape
- Spackle knife
- Sander
There are always other smaller tools involved in any project, but these are the main ones that we used for this board and batten DIY project. For example, we didn’t include the pry bar that was used to pull the old baseboard off the wall, or the screwdriver used to remove the outlet covers. In the end, we did not have to purchase anything new for this project and our hope is that most of these are tools that you already own as well.
Steps For Board and Batten DIY:
Step 1: Hanging the Board and Batten
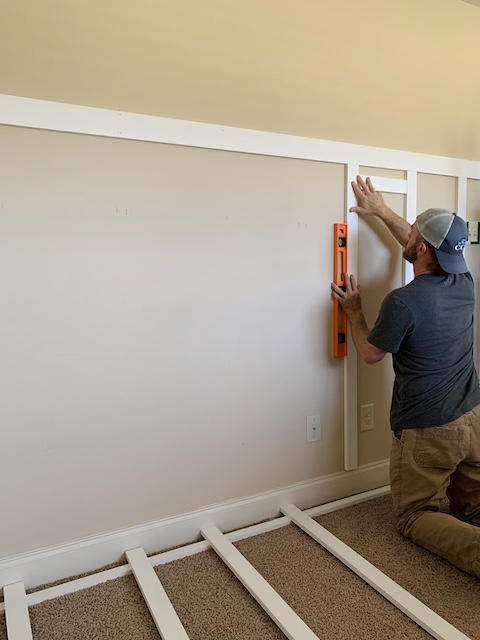
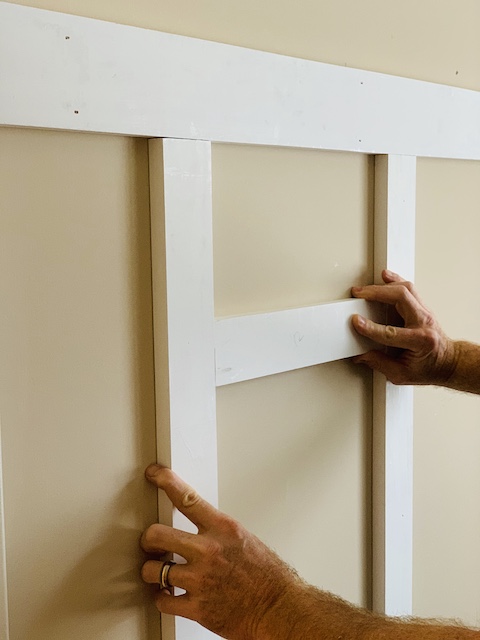
We decided to start with the top board. Remember, we have lots of experience handing horizontal boards! The height was purely subjective – Mark held the board up and I stood back and said “Yeah, that looks good.” You may want to consider things like light switches, future design plans for the walls, or overall aesthetic when determining the height. In the end, it is basically up to you!
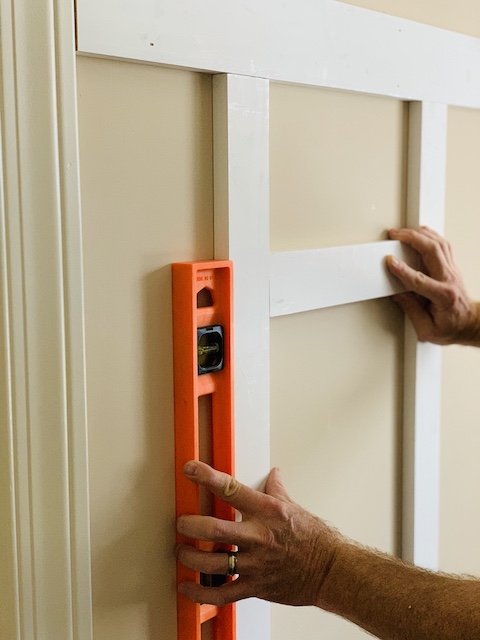
We checked our walls and marked the studs throughout the room and then started hanging. We applied a little liquid nails but since we nailed into the studs we knew the top board would be secure. We worked around the room, using a level as we went. We have a 4’ level which was helpful when working around the doors and window. We did not measure from the floor or ceiling as we worked around the room, floors and ceilings can often fluctuate and could cause the top board to not be level. A 360 degree laser level can be helpful although we did not have one for this project.
NOTE – most people would have started with the baseboard – if needed. We did not start with the baseboard because at this point we did not realize there would be an issue. We did eventually discover that the batten did not matching the baseboard – so be sure to check that before you begin. In the end it didn’t cause a huge impact starting with the top board.
After we completed the top board, we added the baseboard. In a similar fashion to the top board, we set our initial height (based on where the original baseboard was) and worked with our level around the room, using liquid nails and nailing into the studs.
Now it was batten time! We started cutting and hanging the batten pieces based on the original diagram we created. Since most of the batten do not line up with a stud, the liquid nails is a requirement. We did use a nail or two which helped to seal the batten to the wall. The diagram already had the spacing so most of our time was spent cutting the batten to the correct height. There were still some variations as we worked around the room even with the best attempts at leveling the top board and baseboard. For the most part, we followed our diagram as we worked around the room. There were a couple corners or awkward spaces where it was easier to line up the batten in the moment. It is easier to make a decision after seeing a dry-fitted piece on the wall as opposed to a drawing on paper.
Under our window we did have to trim the top edge of the batten since we once again encountered the issue with the existing trim not matching the 1×3 batten. This was a minor adjustment and one that we don’t even notice today. Also, a few batten boards overlapped an outlet. In those cases, we notched the batten to allow space for the outlet cover to fit.
Last up was the cap piece that went on top of the top board. This top ledge finishes out the look of the board and batten – and also gives Porter a place to showcase some of his favorite Lego men or figurines! The installation went quickly as I used a little liquid nails and nailed the board to the top of the top board. Some people like to add a decorative trim piece below the cap but since this was for a boy’s room, we didn’t think it was needed.
Step 2: Finish Work … Prepping the Board and Batten
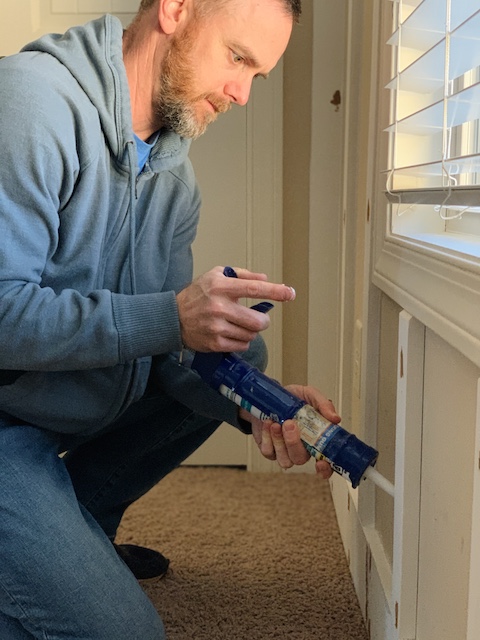
Once the woodwork was completed, we turned our focus to prepping the walls for paint. We used wood filler to fill the nail holes. We already had a darker color wood filler and it worked just fine. There were a lot of holes, so we had a lot of sanding to do. A palm sander is an easy fix but be aware of the dust it generates. We went with the sander! After sanding the wood filler, we had to vacuum and wipe down the walls before painting. The last step was caulking… and caulking… and caulking. Because you have to seal the board and batten to the wall, each piece of wood needs to be caulked. This takes time and requires some patience but doing it well will ensure a good, clean look after everything this painted.
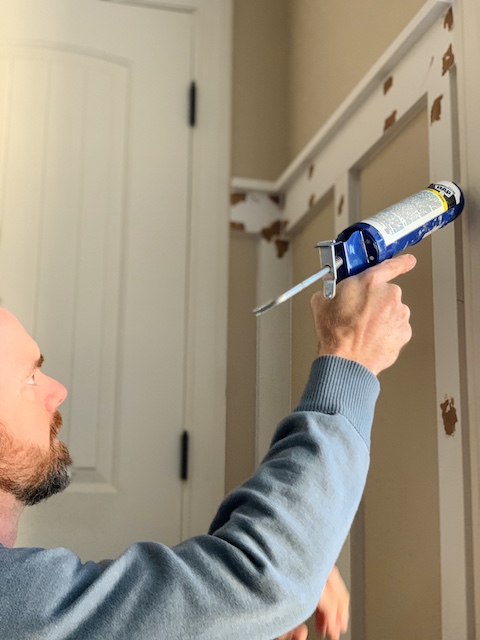
Despite our best efforts, there were some spots were a batten either didn’t match perfectly to a top board/baseboard or variations in the wall caused a batten to protrude slightly. There is no perfect approach in these cases so wood filler or caulk and a little patience/ingenuity/yelling/rework will get you through it. The important part is making the boards appear seamless. Wood filler can be sanded and caulk cannot so in problem areas it may be best to work with wood filler.
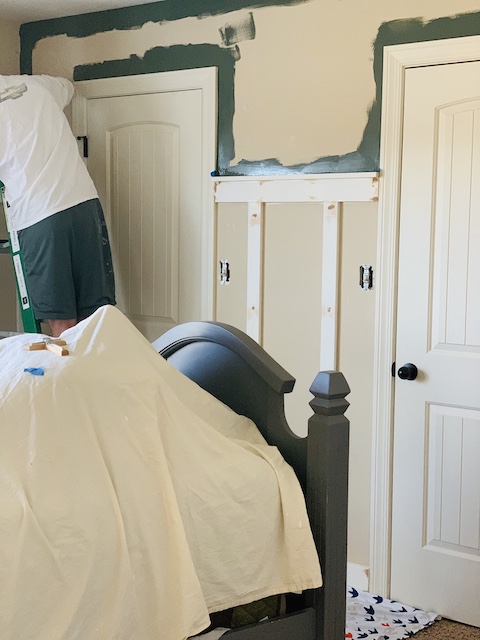
Step 3: Painting the Board and Batten
After the prep work was completed, we shifted our focus to painting. We consulted with our son and together we chose the perfect green (SW – Woodland Lichen) for the walls. For the batten we chose a contrasting white (SW – Alabaster) that is similar to other whites we have used in other parts of the house. You can see additional paint colors throughout our home here. We wanted a semi-gloss to hold up to the wear and tear of a boy’s room and also make allow for a bright finish on the walls. While the cut-in did take a while, we were able to get the kids involved in the process – many hands and brushes make light work! The rolling went quick too since the roller could easily fit in between the batten. To be consistent, we used the white on the door and window trim as well. The semi-gloss worked fine and with the board and batten touching the trim in many places, it just made sense.
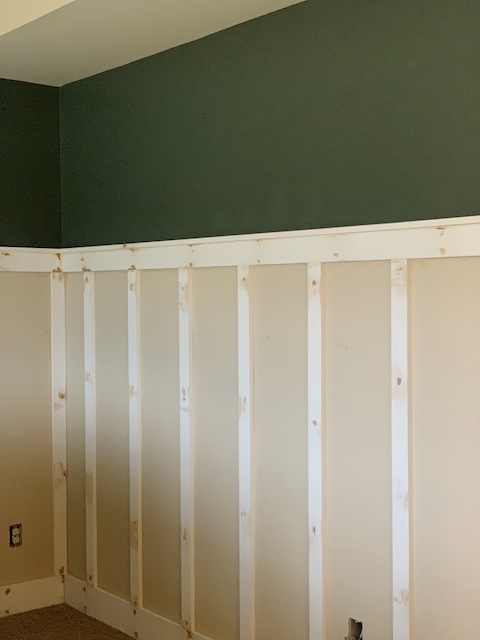
We allowed the white to dry for a day and then taped off the top board on the board and batten. The Woodland Lichen green was easy to apply but when rolling we wanted to make sure that we didn’t drip on the white that was already finished. Given that it is a darker color, we did multiple coats because we wanted the eggshell finish to be consistent across the way.
We took the opportunity to paint his ceiling as well. The building-grade ceiling paint didn’t match with the new colors and we found in other rooms that brightening the ceiling really makes a difference.
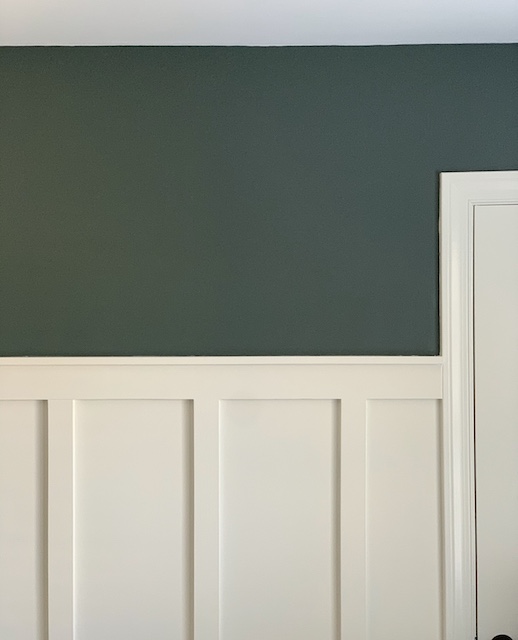
Wrap Up
At the end of the day, the board and batten DIY took a little longer than expected but not for the reason we originally thought. The HOWS that caused so much concern at the beginning turned out to be minor. The caulking and painting, things that usually go quickly, took additional time. But, as is often said – the harder the work, the better the outcome . We couldn’t be more happy with the end result. We also love how each of our children have a room that is unique to their tastes and gives them a personal space that is all theirs. AND – this board and batten DIY allowed us to try something new – and we think that is the best part!
We are not quite done setting up the room just yet – we are still waiting on a desk and a few other things. But, check back with us for the full reveal!
 Simple Dollar Tree Ghost Transformation
 How To Build A Birdhouse With Scrap Wood
 Top 5 Blog Posts Of 2021: Fridays At 5:00
 Cut Flower Garden In A Raised Bed


[…] we finished the board & batten in Porter’s room (see that details of that project here), we had a lot of wood left over. The wood for the batten was sold in 8 foot lengths and I […]