There isn’t anything I like more than a really good chippy piece of furniture. You know, the kind of chippy furniture that screams …. I AM OLD! As you may have guessed, I am so drawn to things that show their age and I am drawn to things that tell a story. While I do love the character, I do NOT love the actual chips of paint falling off all over my home. With that in mind, I will usually seal my chippy pieces with a topcoat. That helps to prevent the paint from actually chipping completely off and it saves me a lot of cleanup. I have used a lot of different products (things like Polycrylic, Polyurethane, Finishing Wax, etc..) and while I love most of them, I don’t always have them on hand when I need them. Also, these products can be expensive. So, I thought I would try making my own ‘topcoat’ using things that I already have here at the house. This DIY topcoat for chippy paint is very easy and very affordable!
I searched the internet for ‘recipe’ ideas for this little experiment and there were lots and lots of sites that all suggested the same ‘homemade’ recipe. It is actually a mixture that is mainly used for decoupage but I felt like it would be worth a try! The best thing is that it only uses two ingredients, glue and water!
WHAT WE ARE WORKING ON
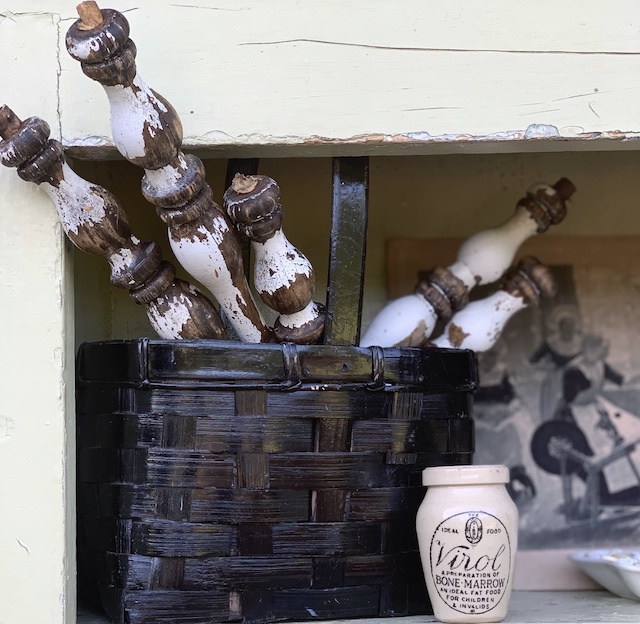
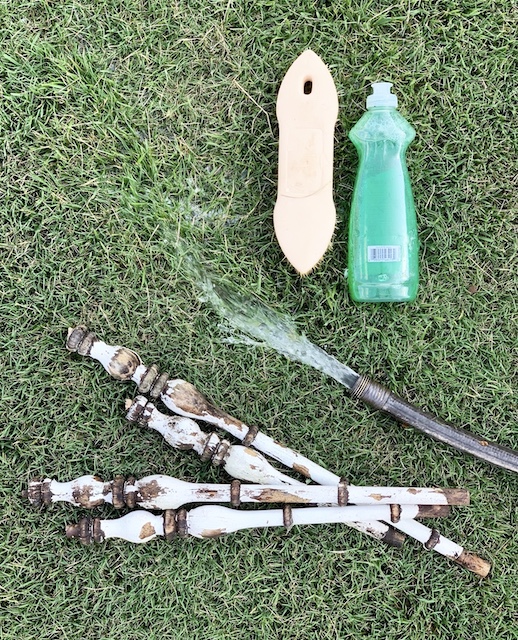
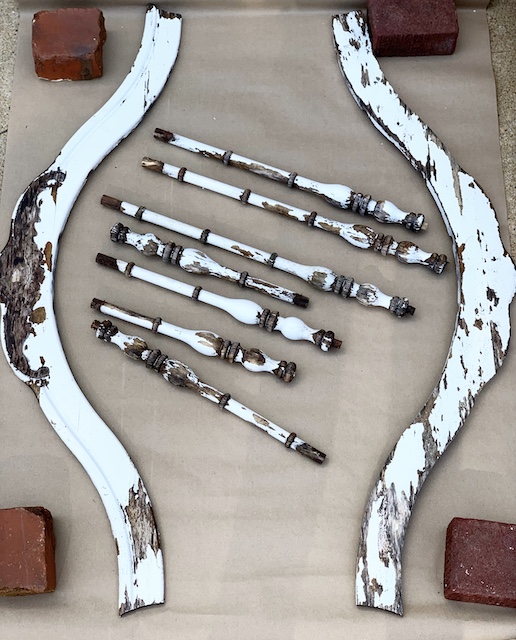
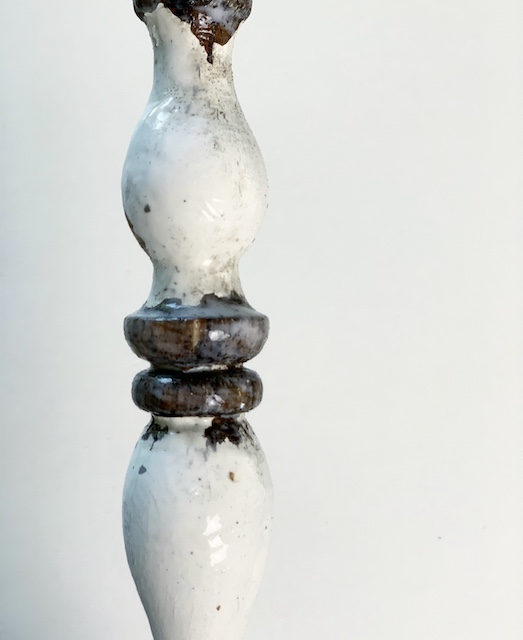
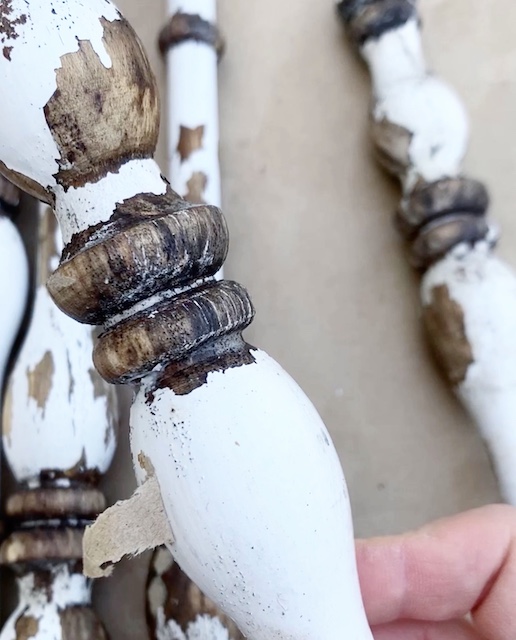
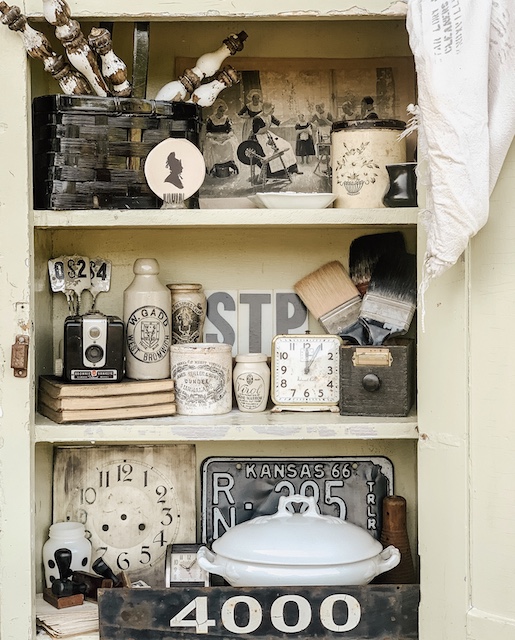
Today I am going to work on these little bedrail spindles. I picked up an old chippy headboard for a few bucks at a local estate sale a few weeks ago. It was falling apart but I noticed the spindles immediately and felt that they would be great to add to my booth. What I didn’t realize was just how chippy the paint actually was. As soon as I lifted the headboard off of the ground to take it to my car, huge chips of paint began flaking off. I was actually worried that all of the paint would come off while I was moving it around but luckily that didn’t happen. I took the piece home and deconstructed it and salvaged the parts that were still useful. I gave those pieces a very light wash, using mild dish soap and a very soft sponge. I was careful NOT to scrub too hard – I wanted to keep as much of the white paint intact as i could. I just dabbed my sponge all around to remove the dirt and grime. Finally, I just let the pieces dry in the sun for a few days.
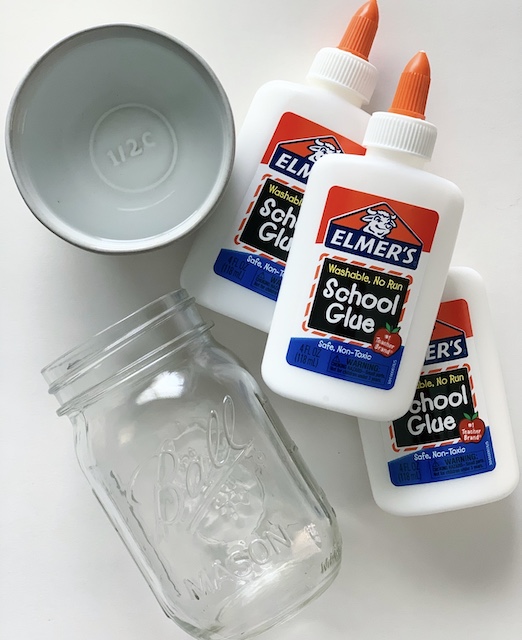
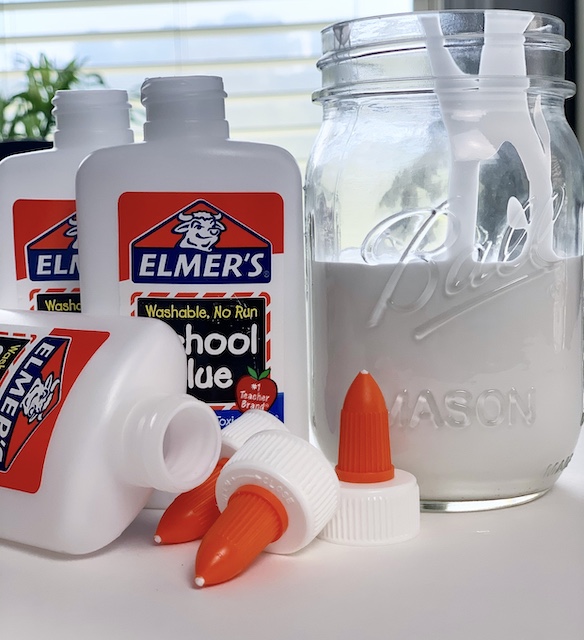
DIY TOPCOAT MATERIALS
-3 parts white household glue (I used Elmer’s)
-1 part warm water
-Jar
-Skewer
-Paper plate
-Brush
-Craft paper
DIRECTIONS
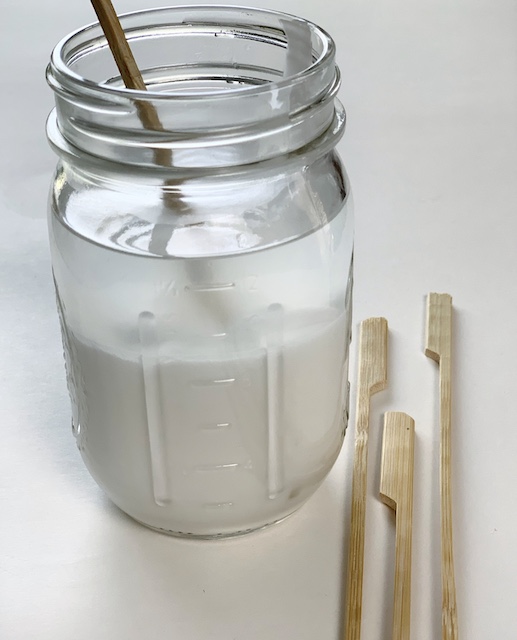
- The first step is to mix the glue with the water. I used a plain ball jar and filled it with three bottles of glue and 4 ounces of water.
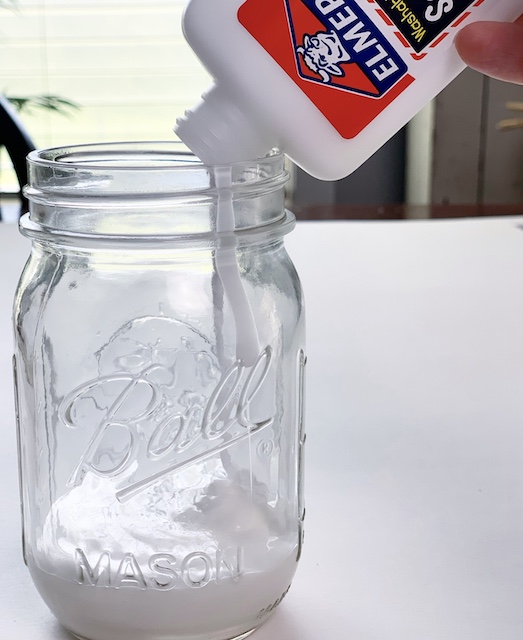

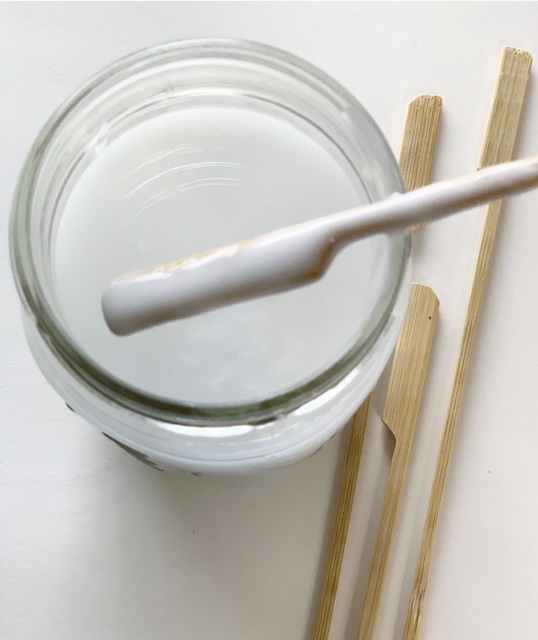
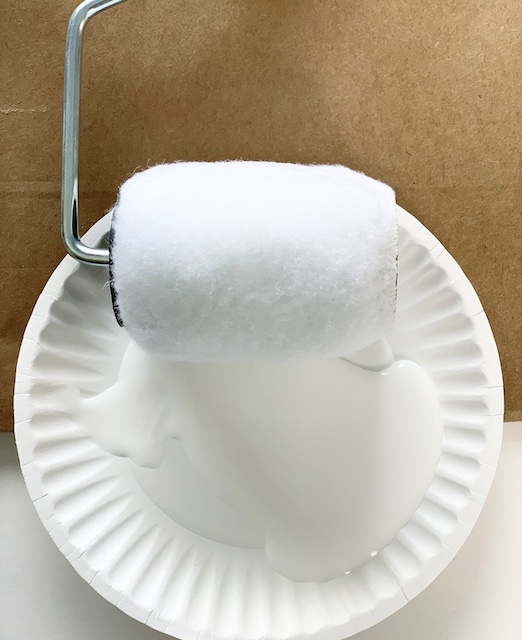
2. Use a bamboo skewer to stir the water and the glue together. When mixed, it will be about the consistency of liquid detergent.
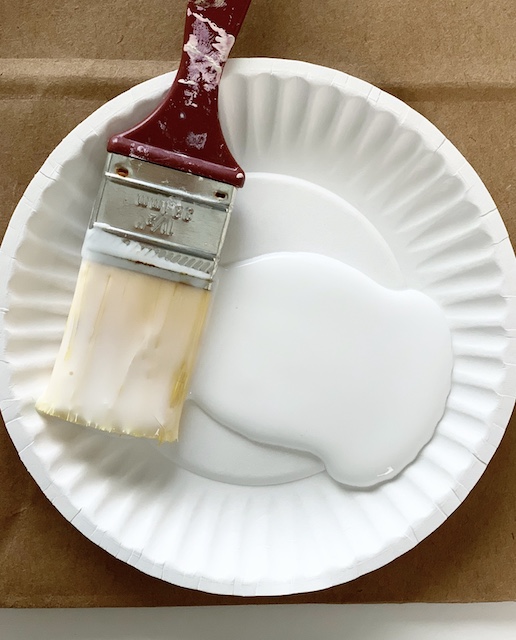
3. I decided to pour some of the mixture out onto a paper plate. I did this because I didn’t want and chips or dirt from the wood pieces to end up floating inside the jar when I was done with this project. I made a lot of this ‘topcoat’ and I am excited to have it on hand for more projects down the road. Also, I would have preferred to use a foam brush but I didn’t have one here at the house so I used this cheap synthetic brush instead. I also plan to use the roller on a few larger pieces of the head board.
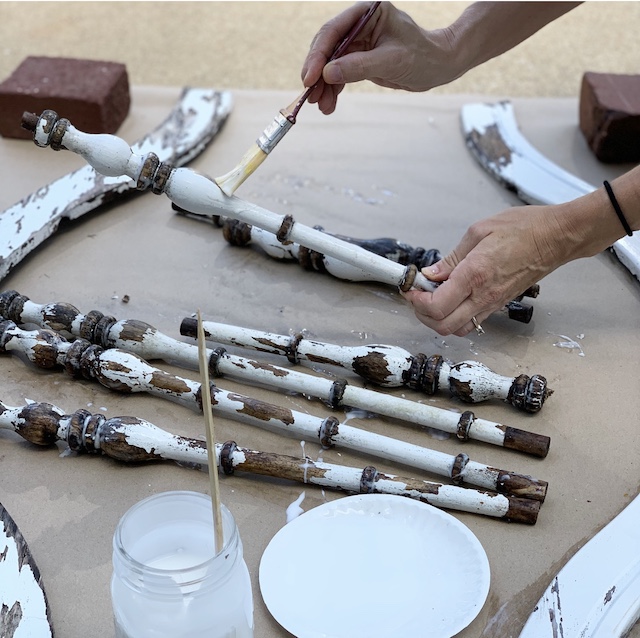
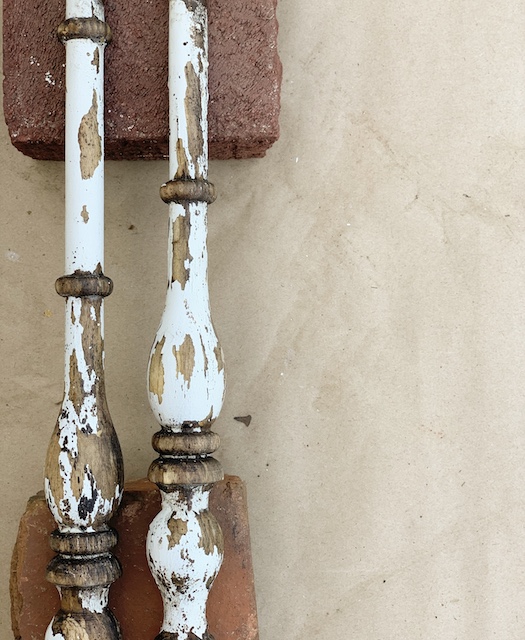
4. I decided to take this project outside because I felt like it was going to be messy. I laid out some craft paper, put the salvaged wood pieces on top, and then I got to work! Using the brush and the roller, I covered each piece with a thin layer of glue. I did this process 4 times – allowing each piece to completely dry between layers.
TIPS
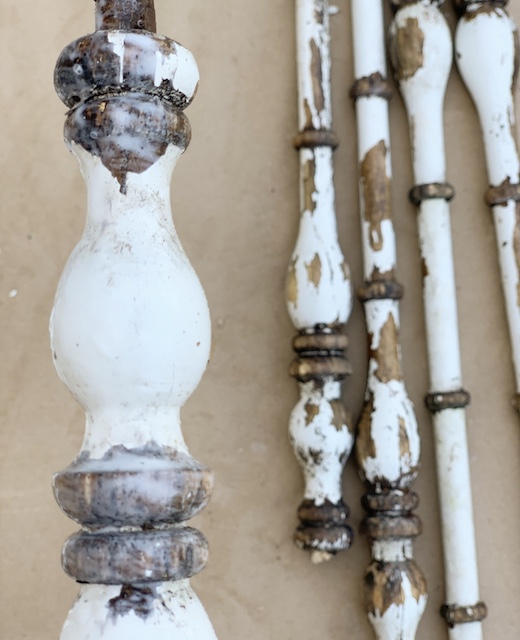
- You may see a ‘white film’ visible when you apply the topcoat and that is perfectly normal. It will disappear as the mixture dries.
- You may want to place your wood pieces on some bricks or another surface that wont stick. Here, you can see a piece of the craft paper accidentally got stuck onto the wood piece. In an effort to avoid that from happening again, I decided to place the pieces on old bricks to dry. I did keep a bucket of water and a little rag handy to help keep my fingers clean and that helped tremendously.
THE RESULTS
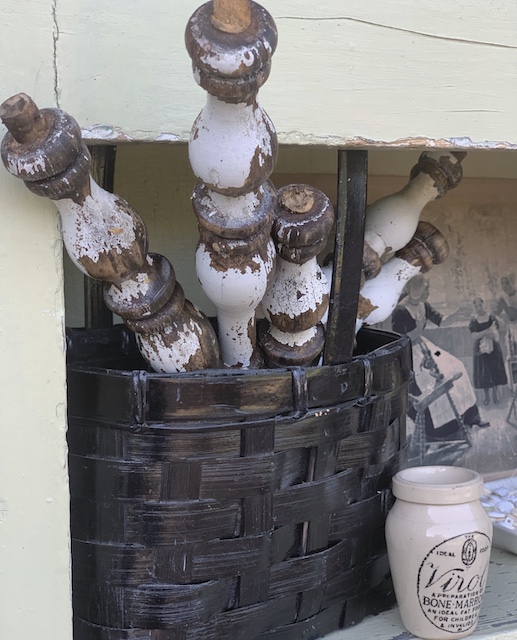
This little DIY project was a success! The DIY topcoat worked perfectly, sealing in each and every little chip of paint. I did use four layers of the mixture – but I bet I could have gotten away with three. I am so happy knowing that I will always have a ‘topcoat’ available to me – as long as I have Elmer’s glue hanging around! Let me know in the comments below if you plan to try out this DIY topcoat for chippy paint!
 Simple Dollar Tree Ghost Transformation
 How To Build A Birdhouse With Scrap Wood
 Top 5 Blog Posts Of 2021: Fridays At 5:00
 Purple Corn Husk Wreath: Double Duty Decor


Love your tip for the wood pieces I will definitely use that thank you.
Great tip! I would have never thought of that!
Ooooh, great tip hun!! I’m definitely going to do this!!! A much healthier alternative!!! No fumes!!
I love this tip
Emily! And I will Be using
It because my spindles are
Chipping Off And are in my wood floors. Thank you girlfriend 😍
What a great tip! I will def try this one. Thank you for sharing.
Great tip! I wonder, if overtime it could yellow like some other topcoats??
What a great idea! I’m always wondering what’s the best way to finish coat chippy pieces and I often pass on things because I just hate the idea of that mess.