Today I am sharing a very easy Thanksgiving vignette using some fun upcycled golden gobblers! I promise you can recreate this whole look with ease! Plus, I am joining in with a whole lot of very talented ladies for a Blog Hop today! You won’t want to miss this!
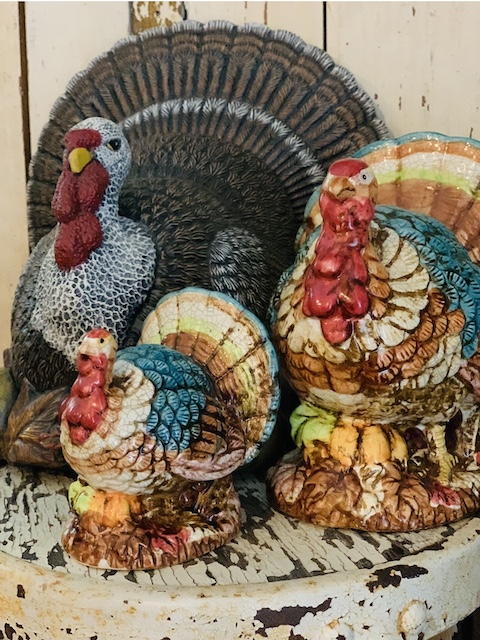
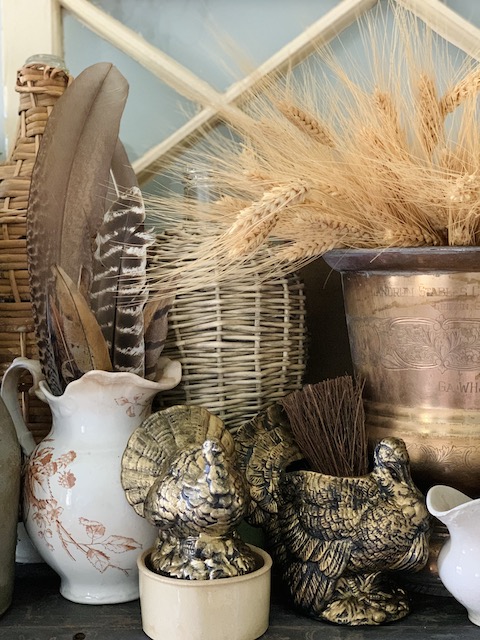
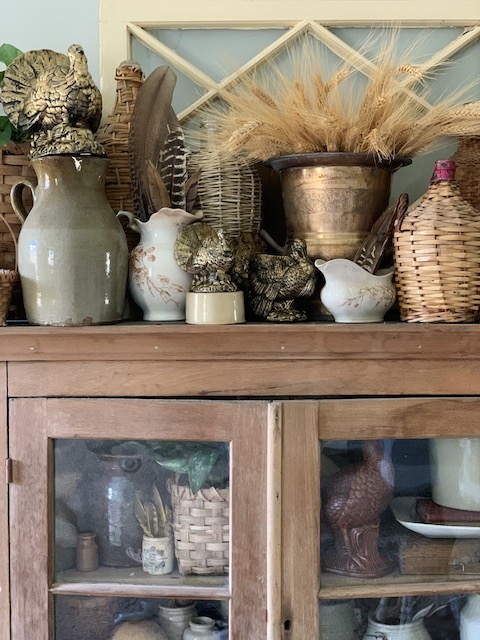
Halloween is behind us now and boy am I am so excited to shift my attention towards our next holiday, Thanksgiving. I love to decorate for Thanksgiving and (like so many of you) I always use a turkey or two each and every year. This year I wanted to create a spot in my home that highlights the upcycled turkeys that I have worked on over the past few days.
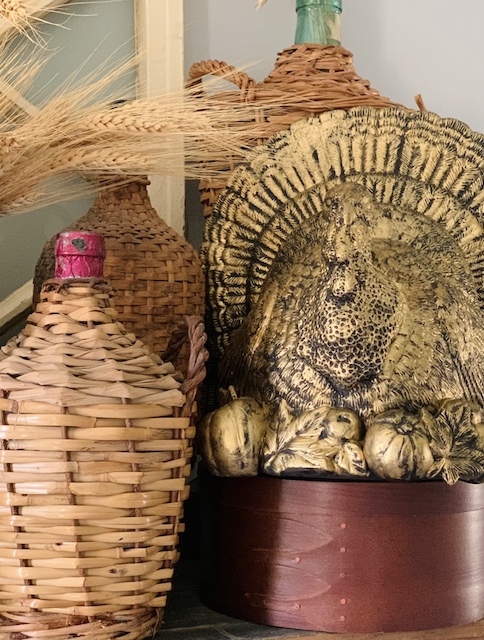
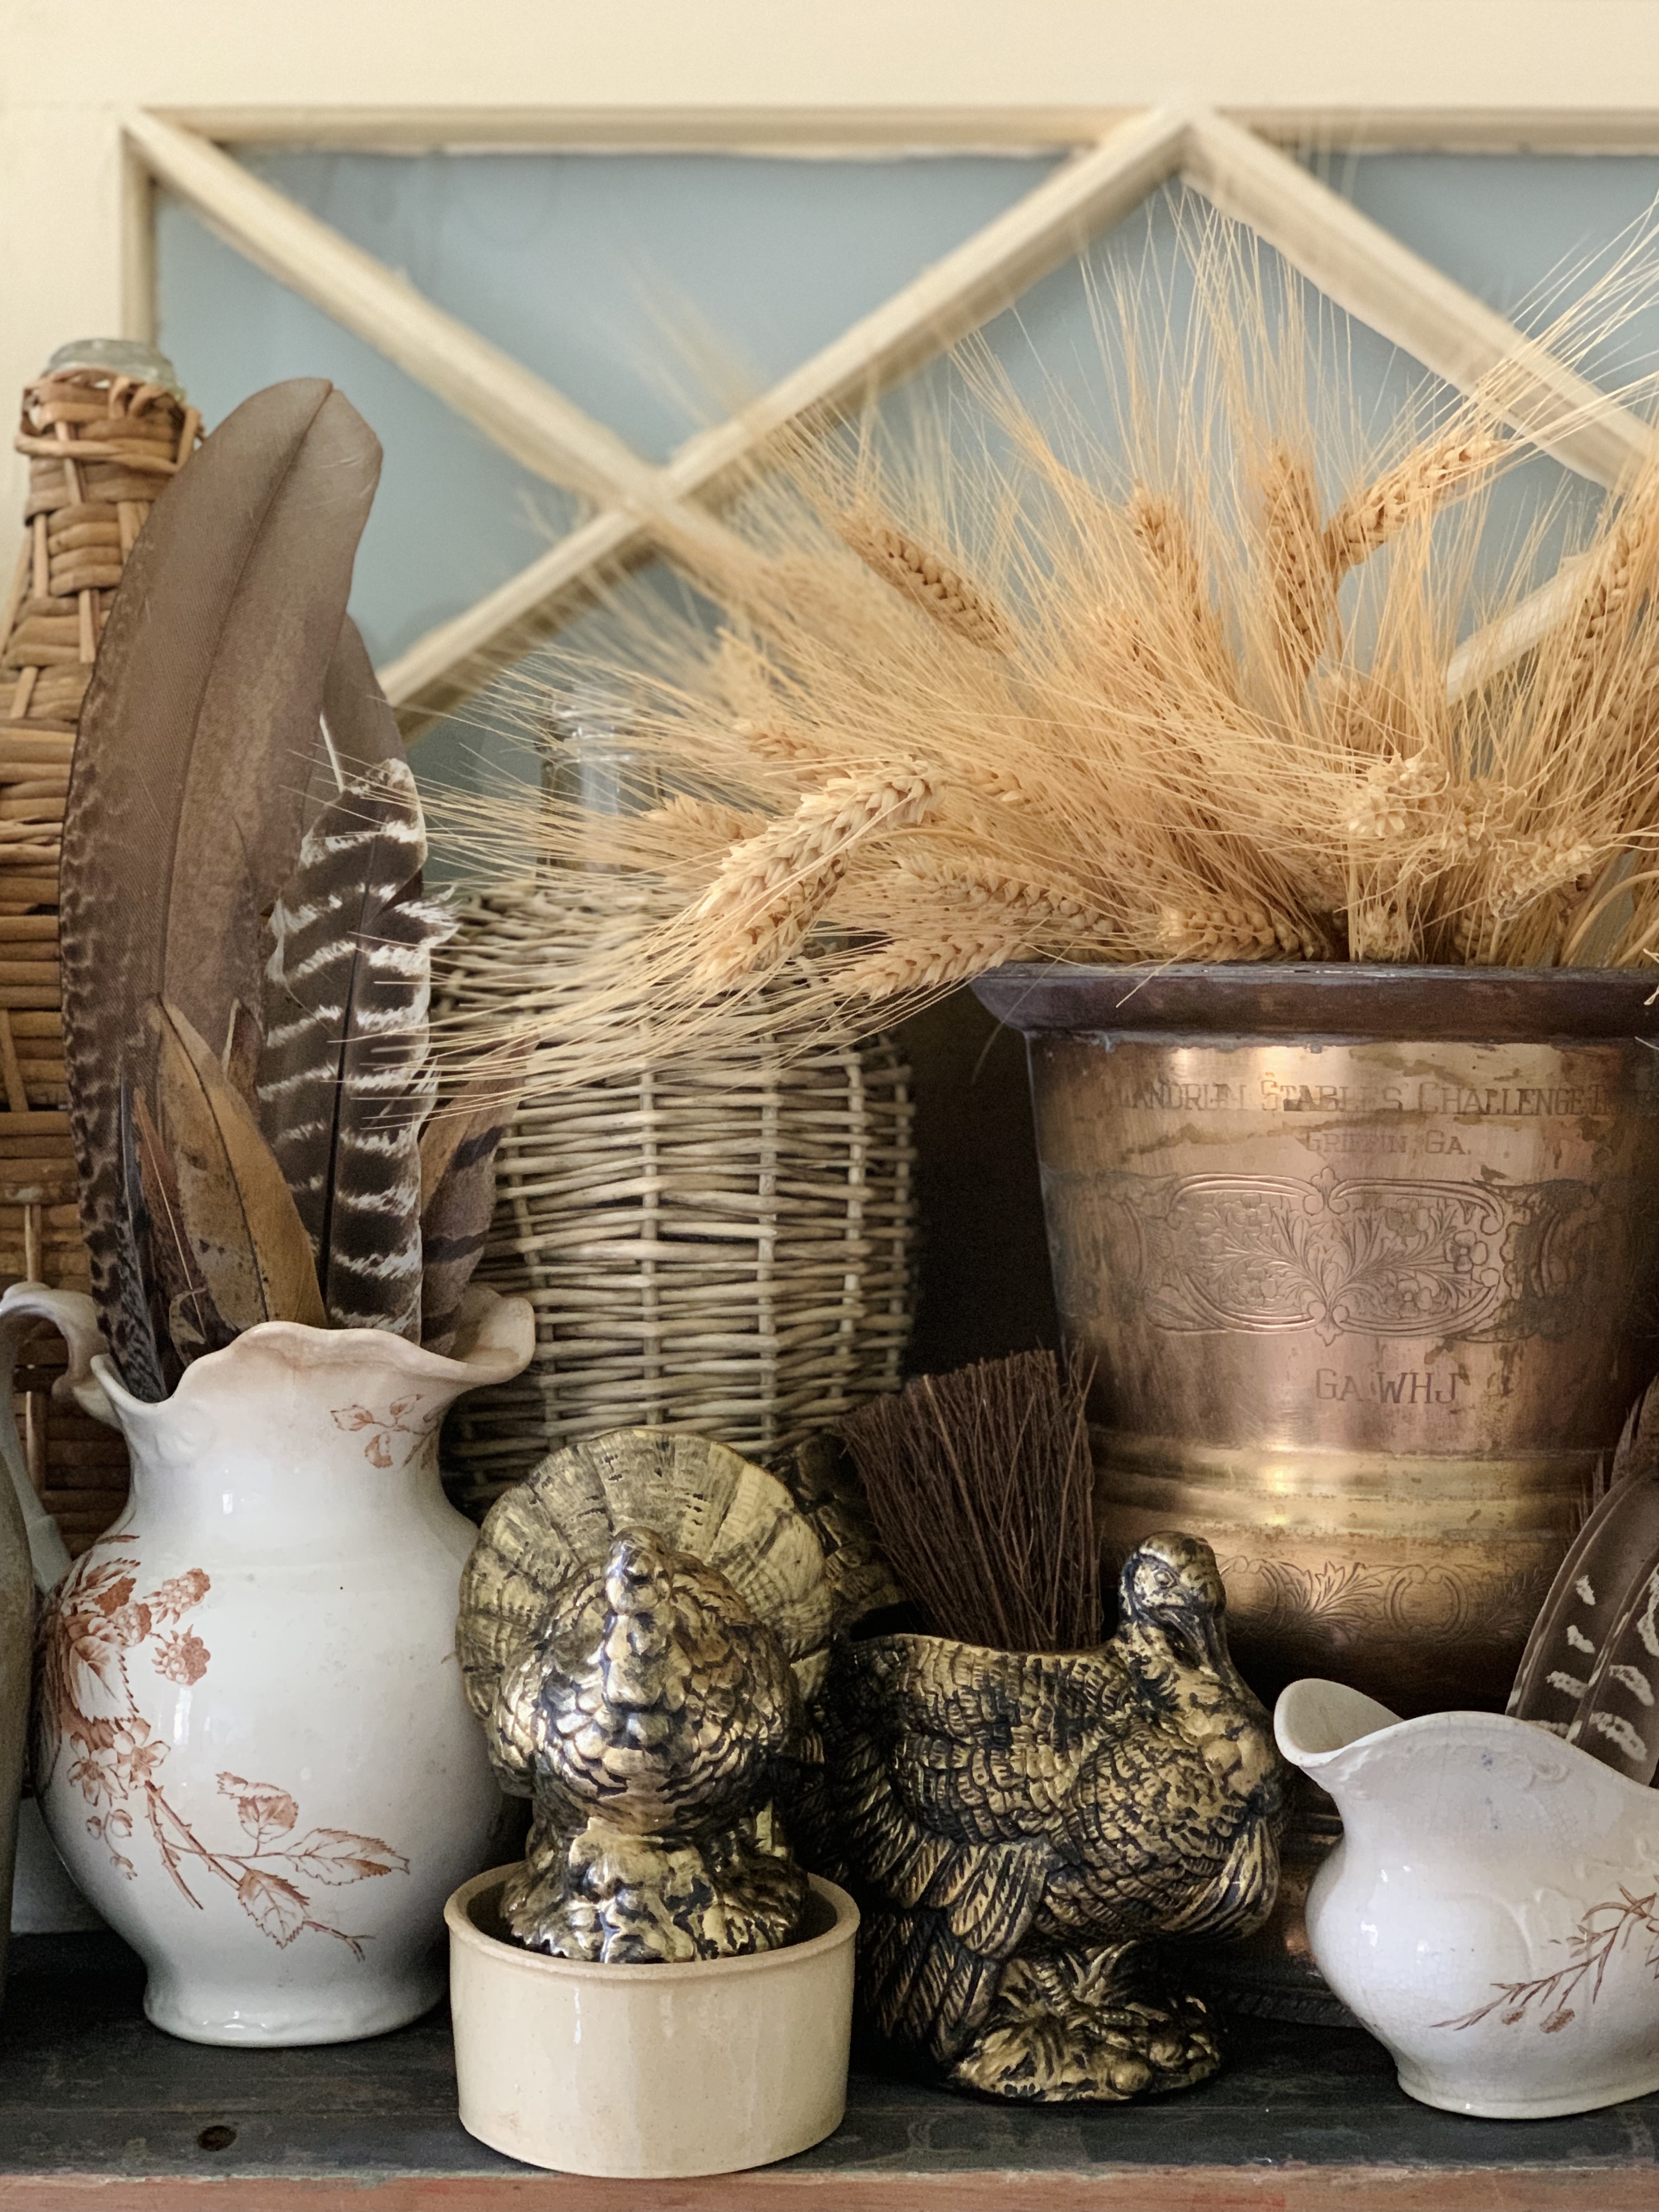
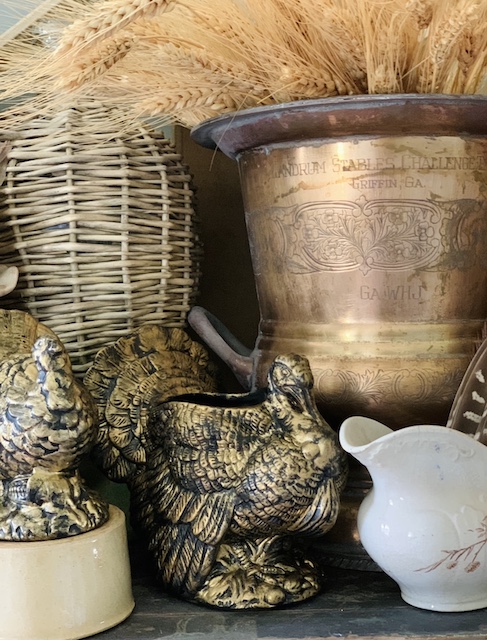
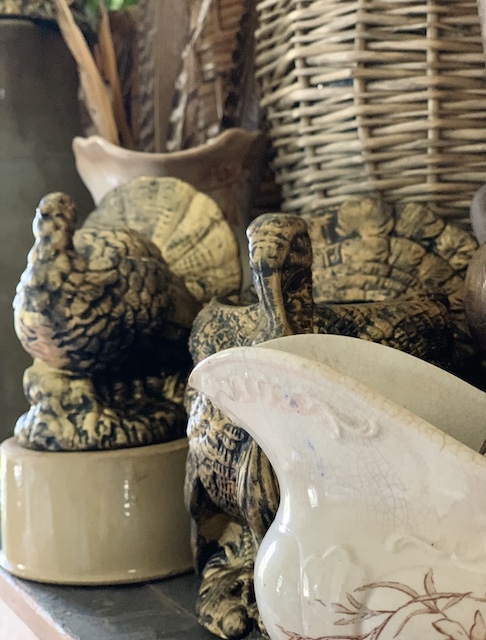
After I made them, I fell in love with these golden gobblers and I wanted to make them the “star of the show” somewhere in my home. I initially wanted to create a golden turkey mantle. I could absolutely imagine them all up there with gold or brass candles, but sadly my turkeys were too big for the mantle so I decided to move them to the top of my very favorite cabinet upstairs. Playing around with them up there was so much fun!
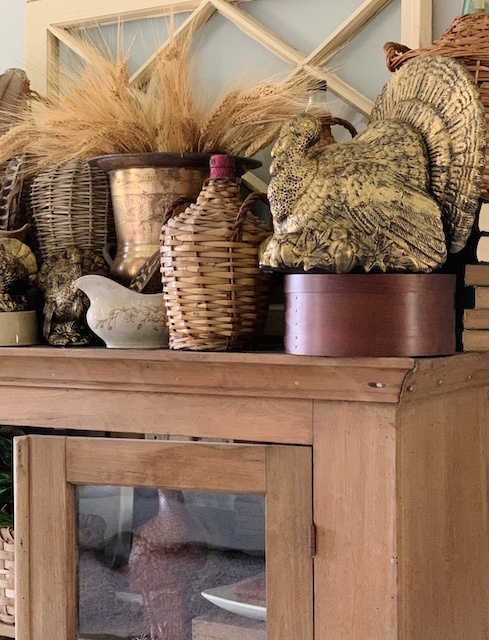
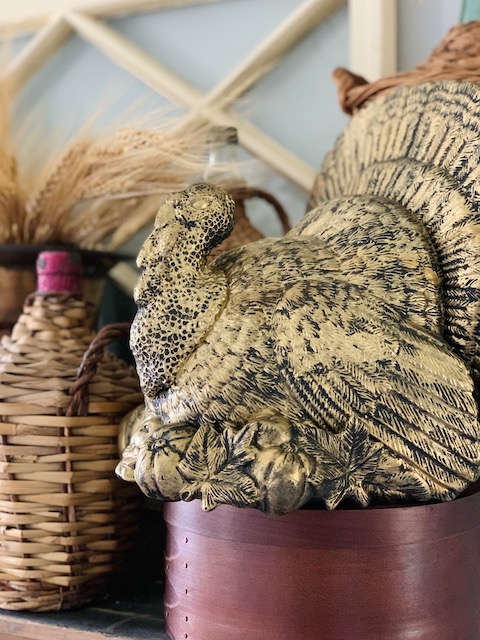
I decided to put the largest golden turkey off to the side. After trying it in a few spots there on the top of the cabinet, I felt that putting him off to the side instead of “front and center” made the whole space more interesting.
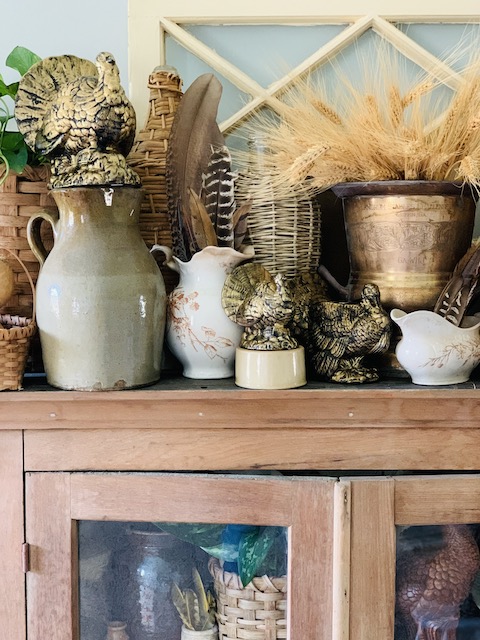
While the golden turkeys are indeed the center of attention, I also love the other simple items that I paired them with. The old trophy champagne bucket was an estate sale find for only a few dollars and I of course love all of the natural texture that the basket covered demijohns offer. The brown and white transferware pieces were from a recent vintage market shopping trip and the split oak basket and shaker box tie in nicely.
Remember above, when I told you these turkeys were upcycled … well, they are indeed! I ‘made’ them all by myself a few days ago. You might think that they would be hard to transform, but I promise you, they are not! Read below to see how to do them yourself!
Let’s Gild Some Gobblers Shall We
These charming golden turkeys are very easy to make. I was inspired by @thevintageporch to take thrifted ceramic turkeys and transform them into gorgeous, sophisticated ones. She was the talented one to share this first (that I saw) on instagram and the process is very simple:
Find Your Turkeys
I found turkeys to upcycle in a few places. I found a really cool one at the GoodWill for a few dollars and then I found a few more at a local shop that resells new and vintage items. I also found a few cute ones at a local antique store. They are out there – you just need to keep your eyes peeled! If you don’t want to hunt around for a turkey, you can search for one online here.
Give Them A First Coat
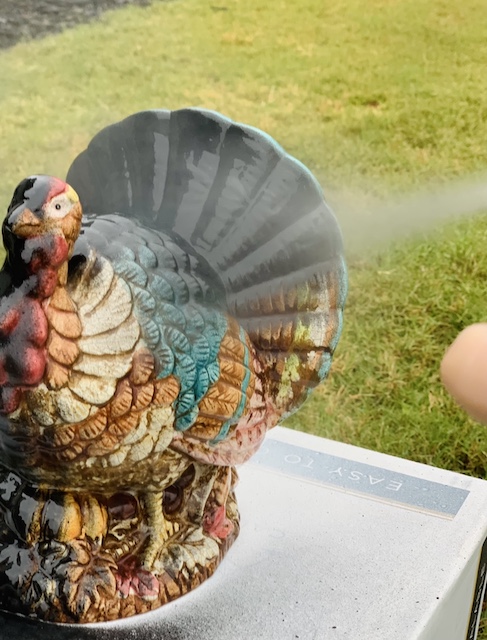
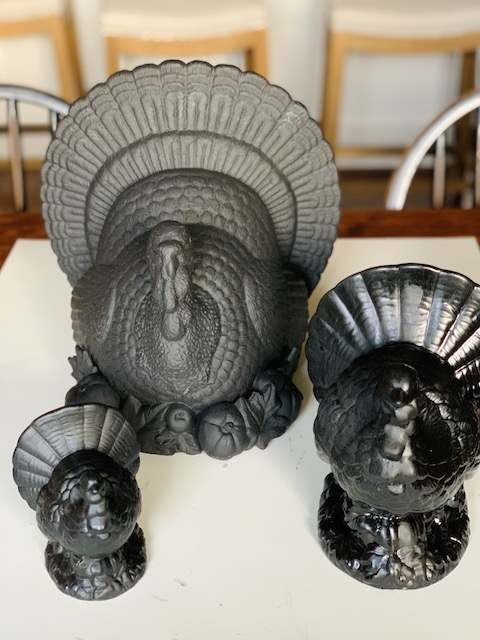
After you have your turkeys the first thing you will want to do is to give them a good coat of black spray paint. I used this flat black color! To ensure even coverage, you may have to go back and give your birds a second coat – I sure did.
Add A Little Golden Kiss
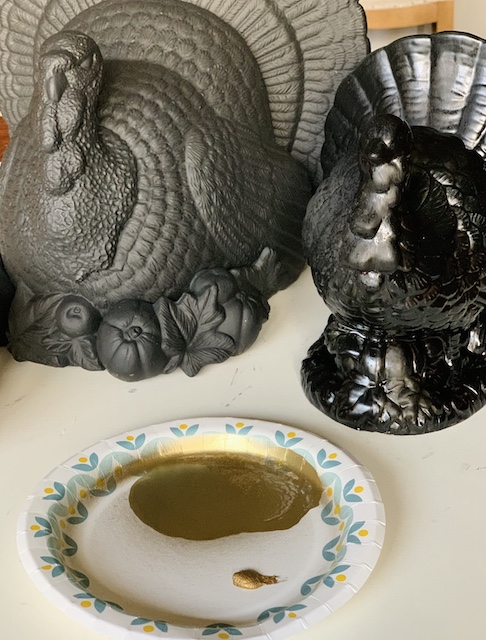
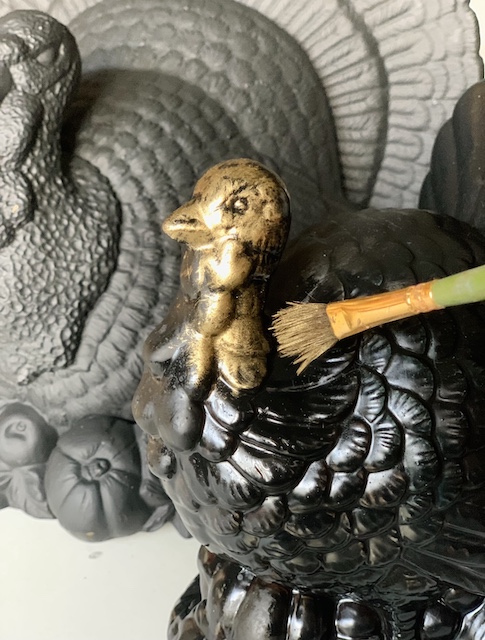
After your first coat of black has completely dried, the next step is to give your turkey a golden kiss. I used a combination of two products that I already had at home. I used this spray paint and this rub n’ buff. I sprayed the gold paint onto a paper plate and then mixed it with a little of the rub n buff. This helped me to create a color that i really liked – not too gold! I then used a dry brush to apply the gold on. I wasn’t careful at all and I just covered the turkeys to my liking!
Top It Off With Antiquing Wax
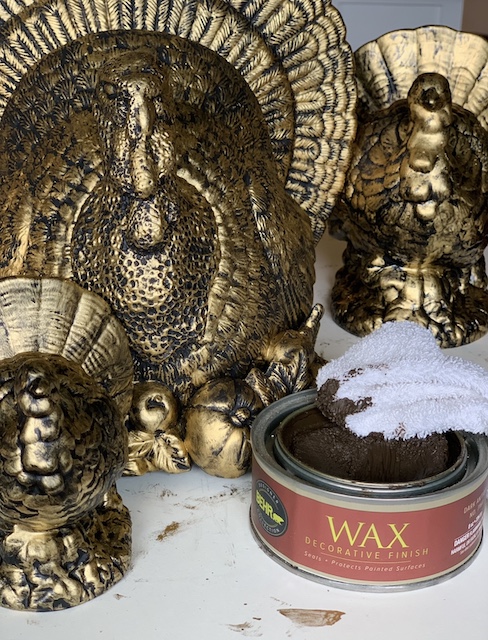
After the gold paint is dried I simply take a little rag and add a bit of a dark antiquing wax. I used this brand – that I already had on hand.
Let It Dry and Style Away
That’s it. That is all there is to it. After the wax has dried then you are free to style away! It really is that easy to give an unwanted thrifted turkey a sophisticated ‘facelift’. I created an idea pin on Pinterest that shows the process – you can click here to see it (if you are a visual learner, like me.)
Look At This!
I did a little shopping around the web and searched for a few turkeys that were similar to the ones that I upcycled. Look at this one from Balsam Hill. I also found this one from Belk and this one from The Gilded Thistle. I think that this upcycle version of a golden turkey is certainly more affordable!
Get The Whole Look Here

It’s Good To Be Home Blog Hop Today
As you may know, on the first Monday of each month, I join in on a blog hop with a few other very talented ladies! It is my honor to be sharing along side of them. Please take a moment to check each of them out below!
 At Home In The Wildwood/ Robyn’s Southern Nest/ JENRON DESIGNS
Southern Spangled/ Crafty Couple / The Frugal Homemaker/My Weathered Home
*this post contains affiliate links
 Santa Blow Mold Styling
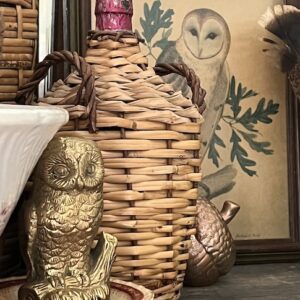 Rub ‘n Buff “Owl UpCycle”
 Dried Hydrangeas In the Cupboard
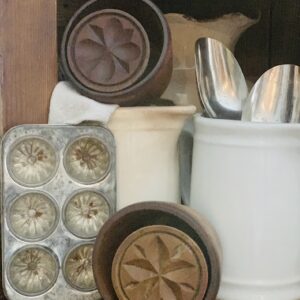 Wooden Butter Molds: Ready For Winter


This is amazing Emily! I was wondering how you managed to find so many gilded turkeys. Doing a diy is such a great idea!
I’m so glad you shared this, Emily! I’ve been inspired to do a few turkey upgrades of my own this season 🙂 I found one in the mountains over the weekend that I plan to spray. Wish me luck!
Those turkeys are so cool! I love how you brought them back to life!
What an amazing transformation to make those gobblers look vintage and chic. I am so impressed with the final outcome for those turkeys form bold colors to a regal antique looking piece. LOVE IT!
I am in love with all these beautiful pieces!
Thanks so so much my friend
I am in love with all these beautiful pieces! So beautiful!
Oh yay! I am so so glad you like them! Thanks so so much!
Oh thank you so so so much!!!!! I am so very glad that you enjoyed the post!
I absolutely love looking at all your photos
of the gobblers and the idea of brushed gold! You are so talented and thank you for
sharing your wonderful ideas 😘😘😘
Oh my word – thank you so so much for your kind words. Seriously, this made my evening!