Looking for a simple Valentine’s Day craft that only takes a few moments to make? These easy wire hearts with nail polish will be perfect!
If there is one thing you must know about me by now it is that I LOVE to decorate seasonally. I also like to get creative with what I use around my house. On occasion I have been known to make a ‘craft’ or two (smirk) and I can not wait to share these really quick and easy wire hearts with you all.
Last year I found this pin for the cutest little nail polish hearts – I immediately saved that pin. A few days ago when I was back on Pinterest I found the pin again and I knew that I wanted to try them out. I clicked on the pin and noticed that the write up was written in another language. Even though I couldn’t read it, I did glance around at the pictures and after doing just that I decided to try making them myself! How hard could it be, right?
After a few mishaps, I finally figured out a process that worked for me and I am sharing it with you below – in English!
Materials
It doesn’t take a whole lot to create these little wire hearts. All you really need is some floral wire and a bottle of nail polish in your favorite Valentine’s Day color! I chose red! There are a few other things you will need and they include:
- Floral Wire
- Red Nail Polish
- Wire Cutters
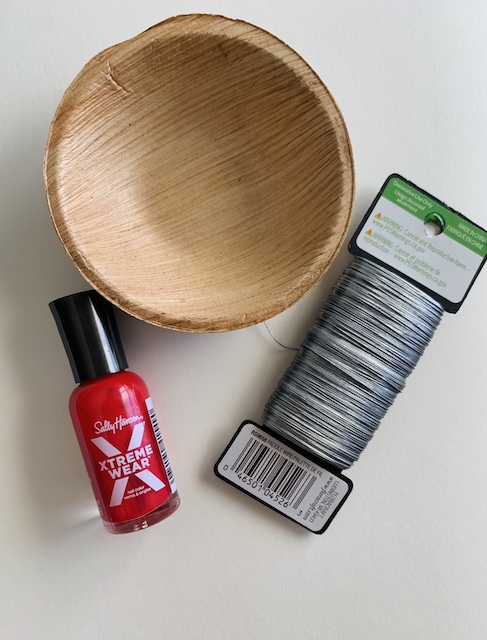
- Small Bowl
- Wax Paper
Process
Snip Your Floral Wire
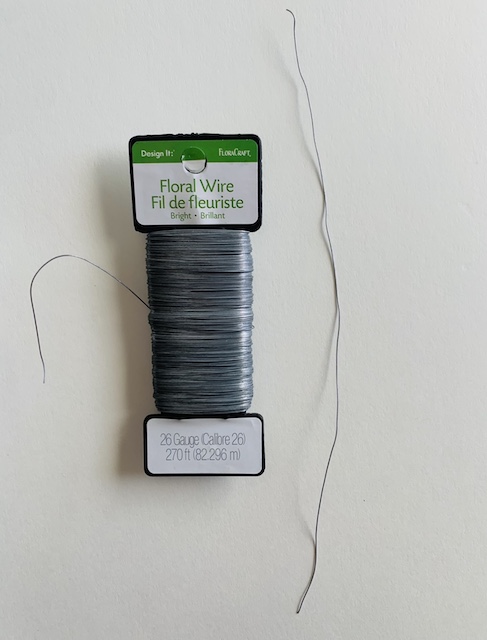
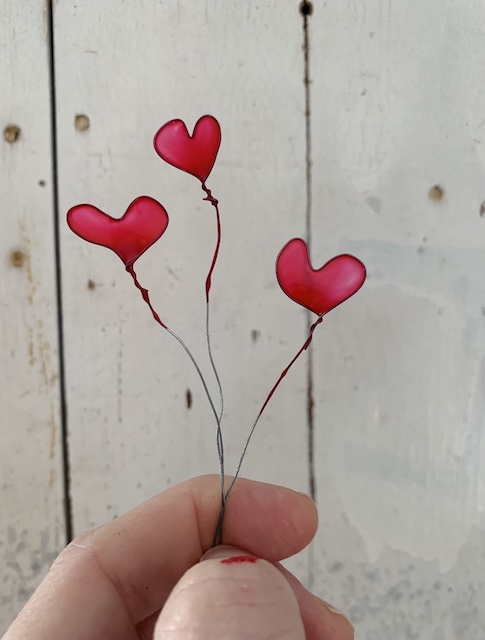
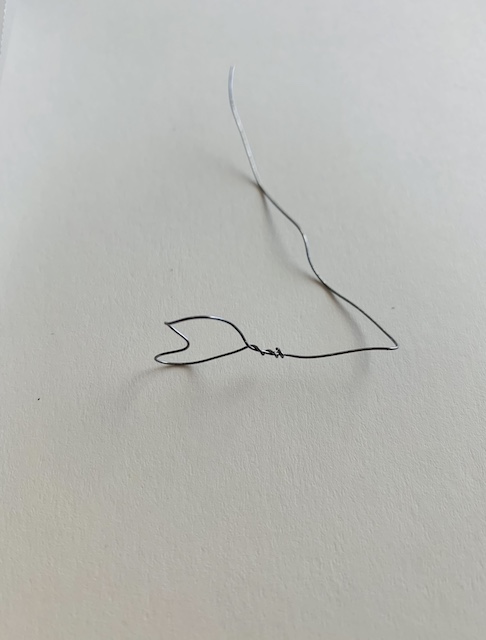
You can choose to make your wire hearts any size that you want but I chose to snip my wire sections in about 3-6 inch sections. I used 22 gauge wire because that is all that I had on hand. While I had no issues at all with this gauge, next time I may try using a thicker wire that is a little sturdy.
Shape Your Heart
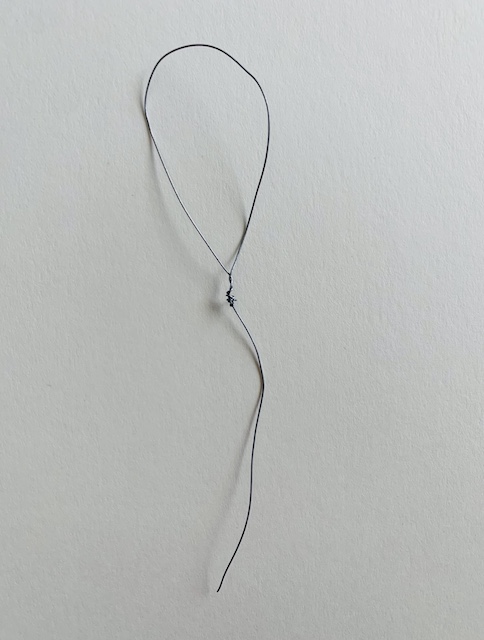

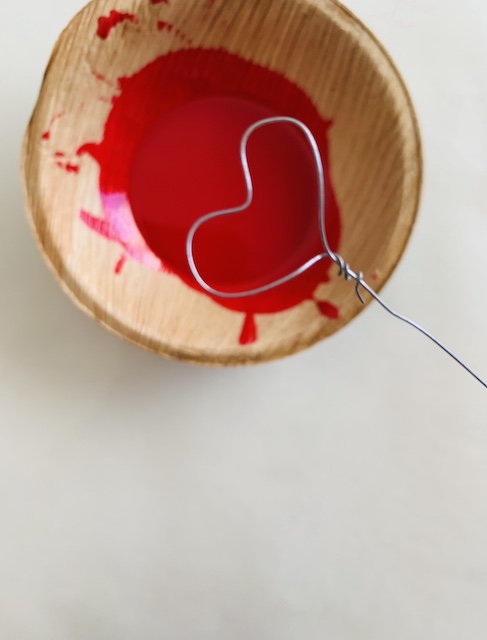
Step One: Take your wire and make a “balloon’ shape at the top. Be sure to wrap the end of wire around the long section of wire.
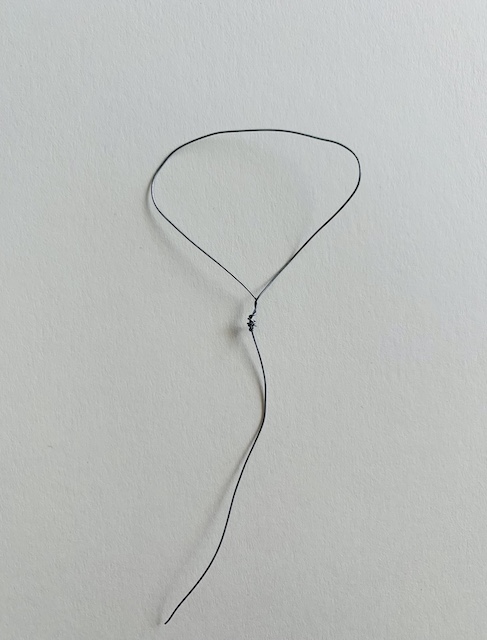
Step Two: Next, using your fingers, stretch out the sides of your ‘balloon’ shape to make it wider.
Step Three: Finally, push down on the top of the wire in the center to create that traditional ‘top’ of the heart shape.
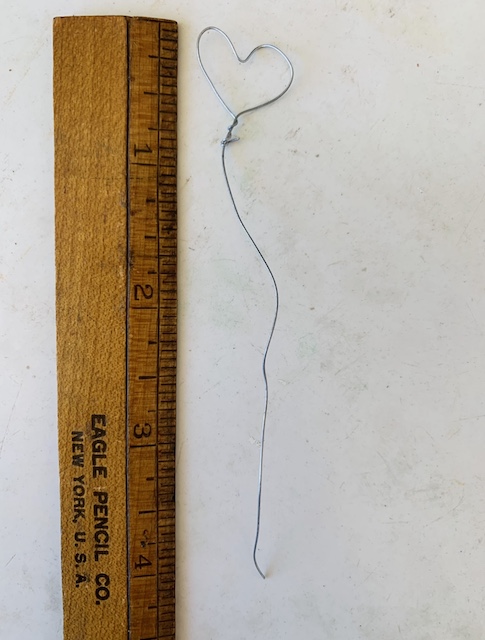
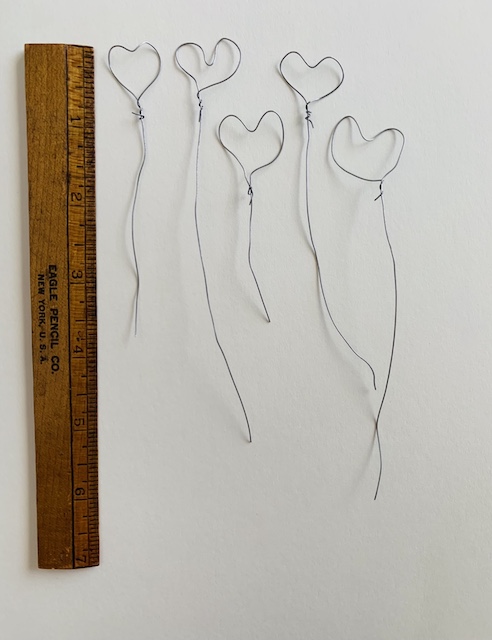
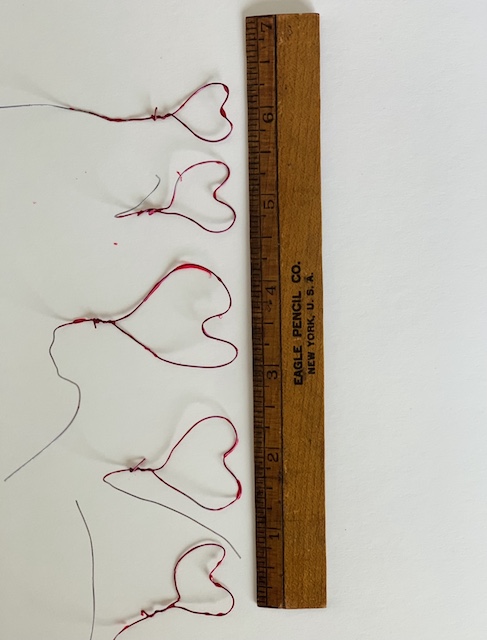
Important To Note: I did discover that the size of the heart matters. I originally made some larger hearts and those would not hold the polish. I discovered that hearts no bigger than an inch worked best!
Prepare Your Polish
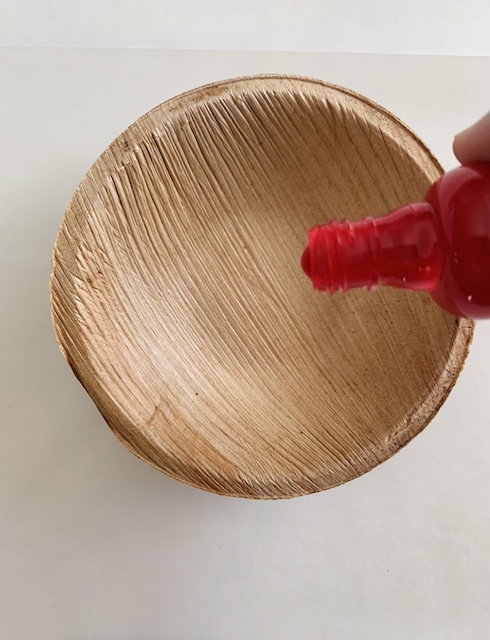
You will need to have a disposable ‘vessel’ that you can use to pour the nail polish in. You will want to use a bowl that you can throw away at the end. I snagged these little bamboo bowls and they were the perfect size! (I found them at hobby lobby in their summer line last year!)
You can use any any color polish too. I chose to go with a bright red!
Dip Your Hearts
The very first thing I figured out is that you will need to bend your wire so that you can submerge your ‘heart shape’ evenly into the bowl of nail polish. You may have to play around and adjust the point where you will bend it.
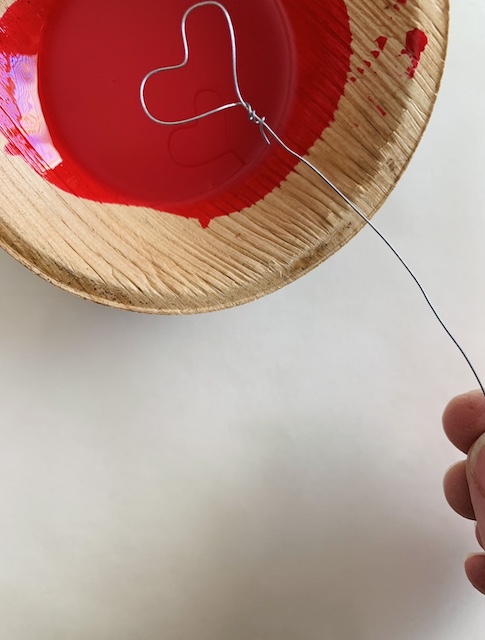
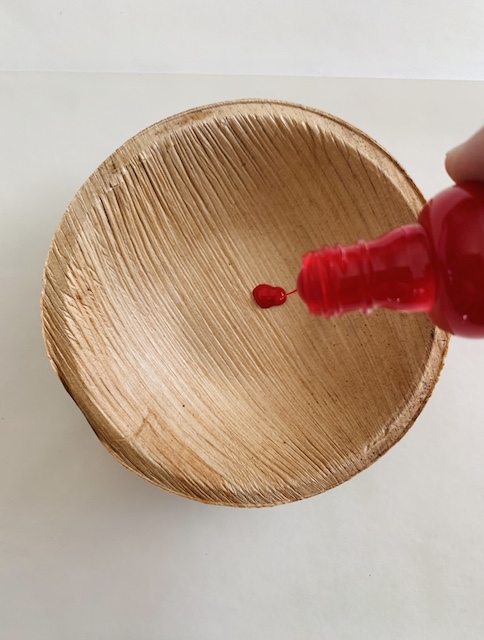
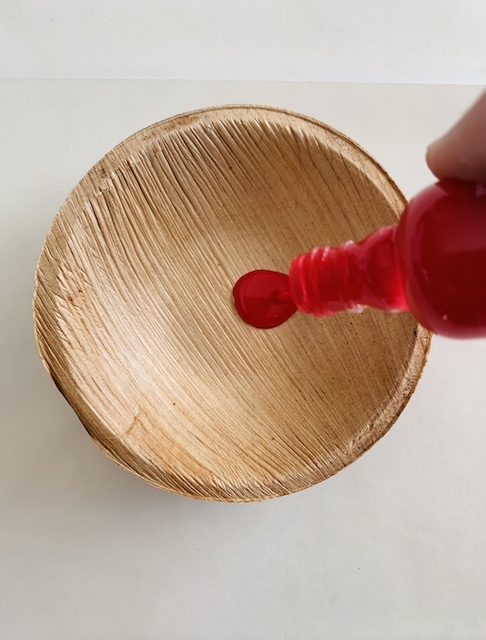
The goal here is to get the nail polish to ‘cover’ the entire heart (I like to think of it kind of like covering a bubble wand with bubbles before blowing bubbles). So, after bending your wire so that you can dip it into the polish, you will then need to flatten out your heart shape as best you can. The flatter you can make it, the more likely the nail polish will ‘stick.’
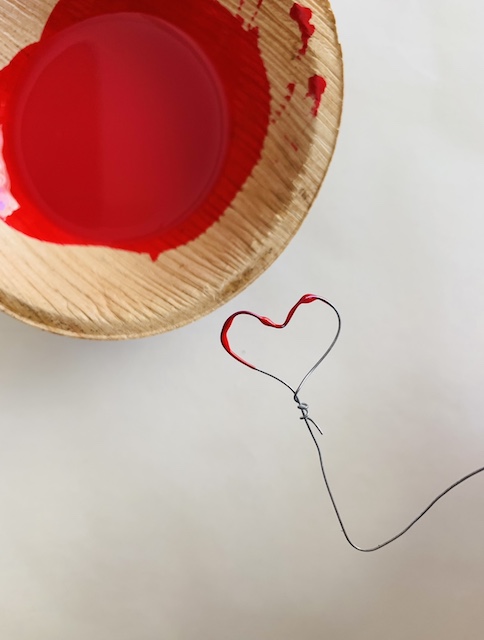
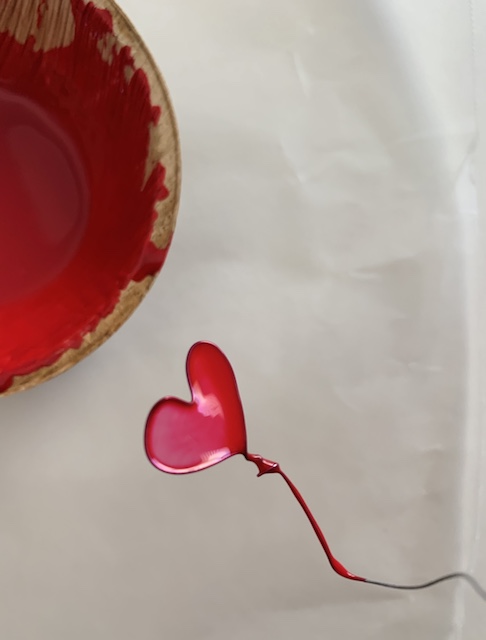
Once your wire heart is all ready to go, then you just dip your heart into the nail polish and gently pull it out – looking for the nail polish to create a ‘film’ across the heart as seen below.
Do not get discouraged if you are having a hard time to get the nail polish to ‘stick’ the first time or two. It took many attempts to get the polish to ‘stick’ for each of my hearts. Just don’t give up!
As I said above, the biggest tip that I discovered through trial and error is to NOT make your hearts too big. I found success with smaller hearts. The larger hearts just would not hold the nail polish – no matter how many times I tried! For reference, below is a photo of some of the hearts that I made that were too big.
Let Them Dry
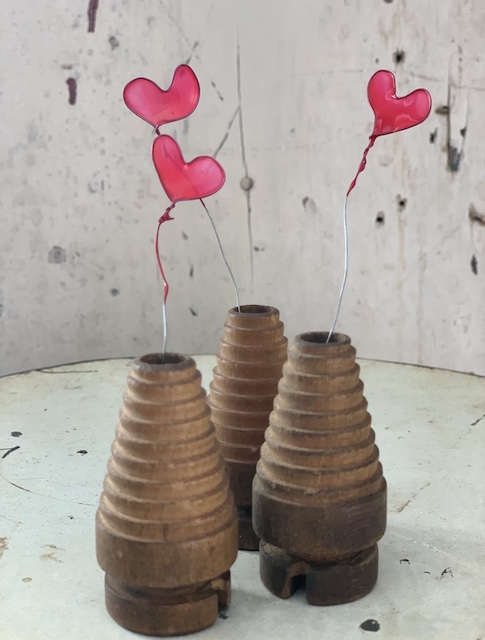
You will need a spot to let these hearts dry. I used these little spools. You could use anything from a cardboard box to a foam egg carton. It just need to be a spot that will hold the wire upright while the hearts dry. And – I found that it didn’t take too long – maybe 10 to 15 minutes.
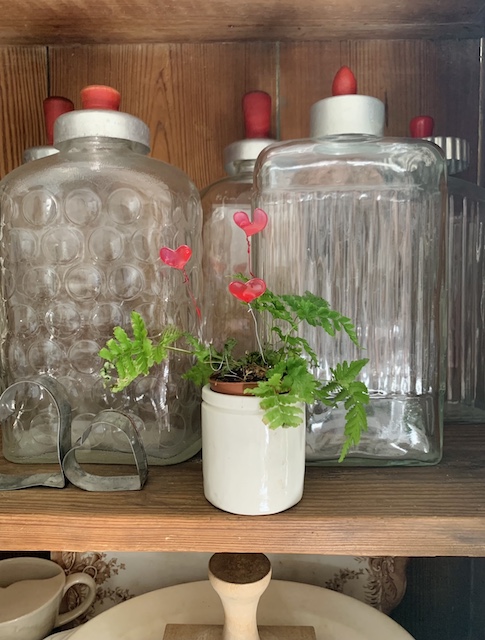
Style Your Little Hearts

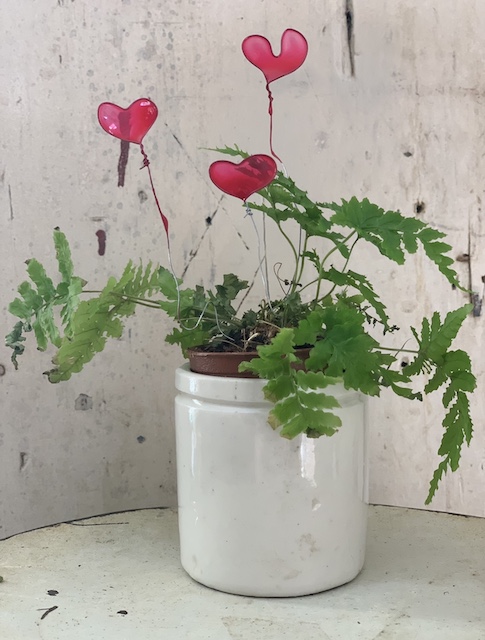
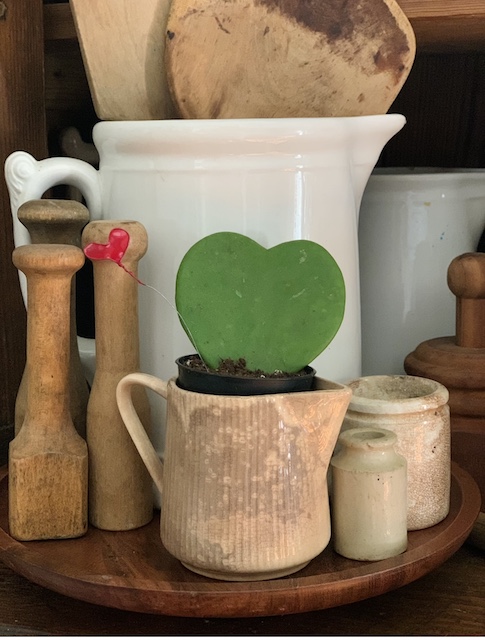
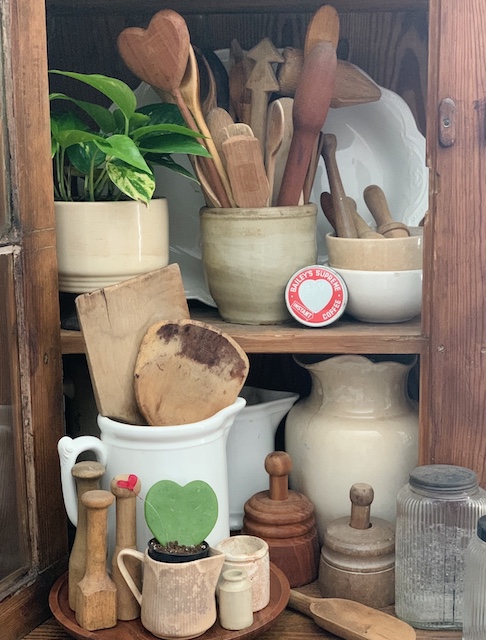
After the hearts were dried I then had to decide where I wanted to put them! I decided to add them into a few little potted plants that I had here in the cupboard in my kitchen.
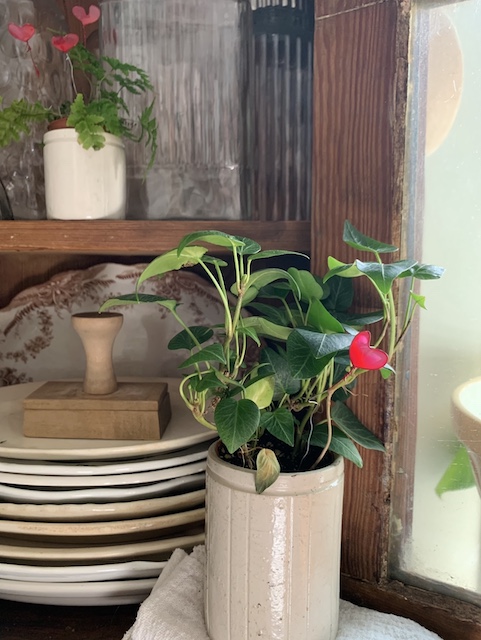
After a little trail and error I decided to add them to these plants for two reasons: the soil held the wire upright easily and the green of the plants really helped to make the red hearts pop!
I hope you enjoyed these quick and easy wire hearts. I am excited to try this in other shapes throughout the year too – stay tuned! Thanks for swinging by the blog again today! I will be sharing more of this space on IG so tune in there if you want to see more! Wishing you all a Happy Valentine’s Day!
 6 Simple Valentine’s Day Decor Ideas For The Kitchen
 Vintage Valentine Decor You Should Be Buying Now
 Red And Pink Vintage Decor Ideas For Valentines Day: Fridays At 5:00
 Outside In: Easy Ways to Incorporate Natural Elements Inside Your Home


I’m definitely not the craftiest person around but I think I could try this one! They are really sweet! Thanks for sharing!
So cute!
Those hearts are darling ❤️
Thanks oh so very much!!!
This reminds me of something we did when I was young. They sold cans of liquid like this, lots of different colors. We would bend wire to form flower pedals and dip them and put them all together to create flowers. I had forgot about this. Your hearts are darling!❤️
Oh my word – yes!!!! Terri!!!! We need to find a picture of that stuff to refresh our memory!!! Thanks for taking a moment to share
I love these! How about green shamrocks?
Yes!!! I need to figure those out for sure! Great idea!
Such a darling idea and so easy to make them! Love it!
Yay – yes!!!! You better give them a try!!!