I have been dreaming of installing new quartz kitchen counters for a few years now and I am so excited to share our process here!

It seems like only yesterday that Mark and I were out in the ‘graveyard’ over at our local counter store picking out our new kitchen counters. While I wasn’t exactly sure what I wanted, I did have a pretty good idea. I knew I wanted new quartz kitchen counters and I knew that I wanted minimal veining (the long, meandering lines of color that traverse natural stone). Mark and I shopped around and I had made my decision basically the moment I saw it.
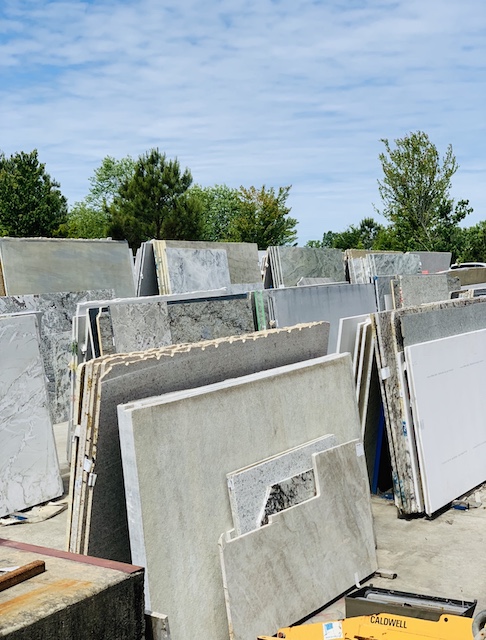
Mark and I choose the Montauk (BG871) for our new quartz kitchen counters. It is light and bright with a soft pearl undertone and works so well with our gray and white color palette. I looked it up and the description of the Montauk literally says, “Montauk is elevated with warm sandy dappling and an ivory marble pattern for a vintage yet modern feel.” You guys, it actually has the word VINTAGE in the description online. If that isn’t a sign that it was the perfect chocie then I don’t know what is!

Mark and I left the counter store with our two little samples of the Montauk and we proceeded to wait several weeks for the delivery. After a few install delays, we finally had our new quartz kitchen counters installed yesterday and I am in LOVE. These counters were totally worth the wait.
The Process Leading Up To Installation
Removal Of Old Counters
There were a few steps that we had to take in order to be ready for these counters to be installed. And the first step was to have the old granite counters removed. That was a job for sure – I learned really fast just how heavy those granite counters really are. Mark and I had to hire the counter store that we were working with to come and remove them and after making a few cuts with a circular saw, they removed the granite in just under 30 minutes. They did offer to dispose of the old counters for us – for a fee of course – but Mark and I decided to have them leave the granite here in our driveway. At the suggestion of our designer who is helping us, we decided to sell the grainte on FaceBook Marketplace. We basically only asked for the amount that it cost us to have them removed. Within a few days, we sold the granite for $300.00 to a contractor in Atlanta.

Cutting the old counters for removal. 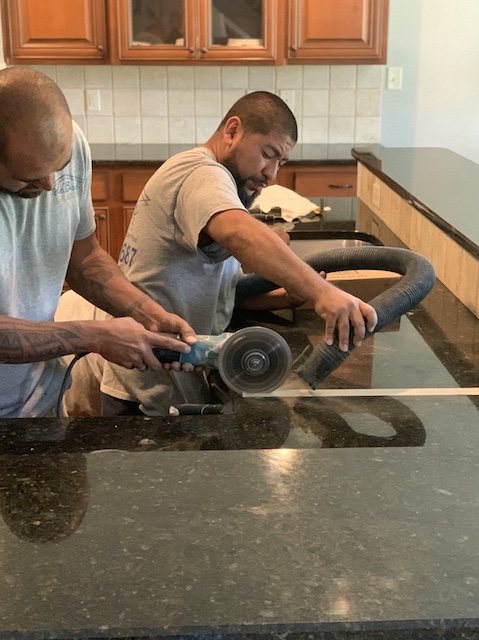
I was happy they used a vacuum to suck up the extra dust. 
You can really see the cut.
Measure For New Counters
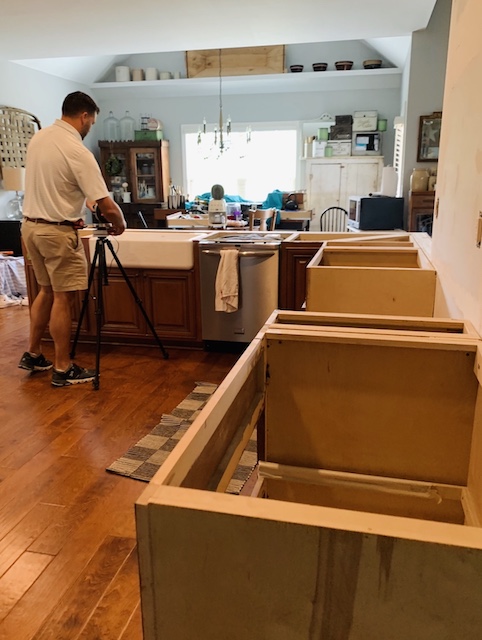
The next step was to have the counter company come out and measure for the new counters. This was really a cool process to watch. The gentleman used a laser to get accurate measurements so that the counters could be cut before they were delivered. Some of the decisions we had to make were:
- How long did we want the bar to stick out: We chose 13 inches out
- How long did we want the lip of counter to hang off all around: We agreed on 1 1/2 inches
- How we wanted the edges to be finished: We went with a modern, slightly rounded edge.
Wait
Our install date did get pushed back a few times but honestly it didn’t bother me at all. I went into this process expecting delays so this was no big surprise to me at all. In fact, this kitchen remodel is truly such a gift that I have been wanting for a few years now! I honestly thought nothing of the delays.

Installation
Four Counter Sections
The counters arrived at our house in four sections and luckily there was only one seam that had to be connected. But boy, each piece sure did look heavy – even the smallest section took some muscle to lift. For the largest section, the workers did use a trolly type contraption to roll it from the truck to the kitchen. I thought that was genius.

The Seam
As I mentioned above, there was only one seam that needed to be connected. When they did finally get the counters on top of the cabinets I was actually nervous. I wondered how they could actually get the seams to match up – I thought it would be an impossible. But, of course, these guys knew exactly what they were doing.
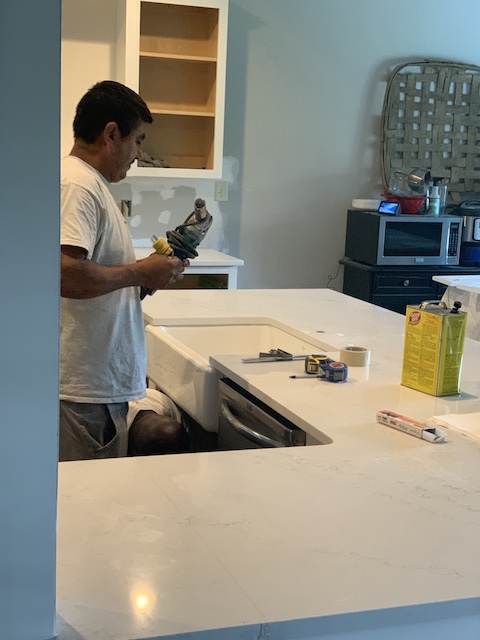
First, they nudged the pieces back and fourth several times to help line them up. Then, they added a glue mixture to the side and then used a contraption called a Gorilla Grip Seam Setter to hold the seam in place and to ensure that it was level. (You can see a seam setter in action here.). After the seam was set, maybe 20 minutes, the workers then used a razor to scrape off the extra adhesive that was pushed to the top and then they sanded down the edges on the sides to make sure that the seams were flush with each other. And that was it! It truly was amazing to watch!
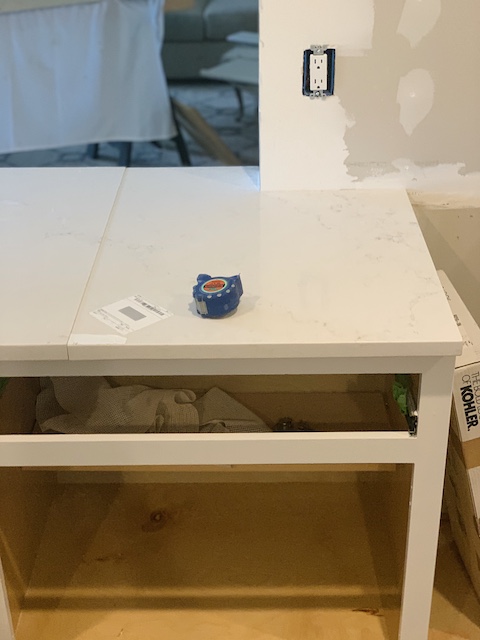
Uneven counters – I was worried. 
The adhesive on the seam. 
The adhesive. 
The Gorilla Grip Seam Setter. 
Using a razor to scrape off the extra adhesive.
Drilling
The last thing that they did was to create a hole for the sink faucet to go in. I was surprised when the counters arrived without a hole. I thought for sure that they had made a mistake, but I was wrong. Right before they left, they asked to see the faucet. I showed it to them and then they drilled the hole. It took only a few minutes of measuring and a minute to drill!
Clean Up
The guys were so nice and kind and they truly did not make a mess – but I did notice one product that they used to wipe down the quartz counters often! They used Goof Off all over these counters and it did the trick. It removed everything from scratches to sticky spots! I guess I am going to have to add this to my list of household cleaners!
The Cost
Remember this is not a DIY project. Mark and I did not feel qualified to even remove the old counters, much less install the new ones! With that in mind, we decided to hire this entire job out. Also, remember that we took our time and saved a lot for this project as well. I have been waiting (and saving) for about 3 years to begin our kitchen remodel! The overall cost for our kitchen counters was right at $5,000.00. This was our biggest cost so shop around, there are a lot of counter options out there on the market in all sorts of price ranges. There are even various price points for quartz. We could have easily spent double this amount on another option, but we could have also picked out an option that was a bit cheaper. You simply have to shop around and see all of the options out there.
Wrap Up
I love my counters. There I said it! These new quartz kitchen counters are honestly all that I have been dreaming of and more. I love the color and character and the durability. Did you know that quartz counters are some of the most durable on the market! Above all, I guess, I am most excited that we were able to really brighten up the whole kitchen with this change! I can not wait to share the entire space with you all once it is all complete!


 Kitchen Counter Fall Decor: Simple & Warm Additions
 Valentine’s Day Cupboard And A Love Story
 6 Simple Valentine’s Day Decor Ideas For The Kitchen
 How To Build A Birdhouse With Scrap Wood


[…] we finally have running water again! As you may know, two days ago we had our counters installed (you can read all about that right here) and yesterday we finally had our new kitchen faucet installed! You guys, I have never ever been so […]