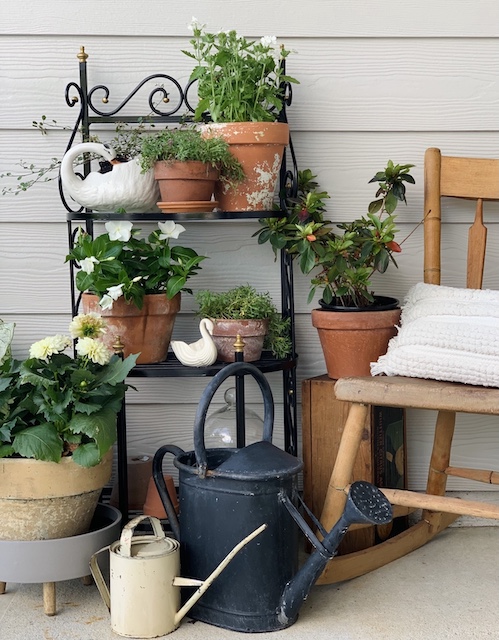
Who doesn’t love a good “vintage” transformation? I know I do and I am sharing all the details behind this rusty plant stand makeover!
Who doesn’t love a good thrift store makeover? I sure do and over the years I have found that the best makeovers usually happen when you aren’t looking to take on ‘another project.’ Don’t you agree? That is what happened the other day when I popped into a little local antique shop and found this rusty pink beauty!
(Before we dive into talking about the makeover itself, I do want to point out that when I showed this beauty over on Instagram – click here follow me over there on instagram – many people mentioned that this may actually be a very small bakers rack! It very well may be – but for the sake of this blog post, I am going to call it a plant stand! Ha!!!)
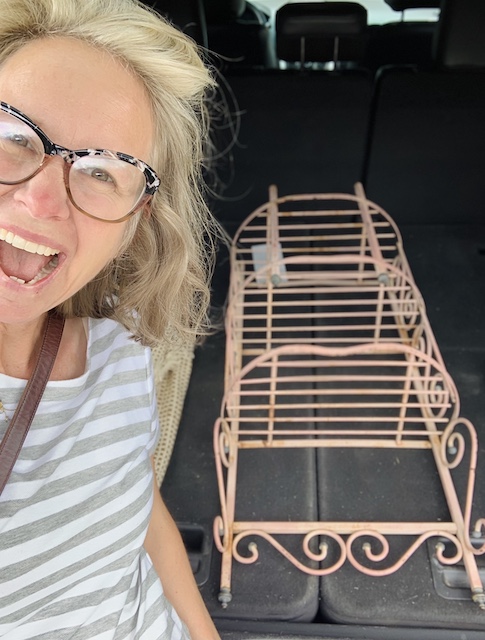
This little pink rack was sitting right at the front of the antique store and when I walked in it caught my eye right away. I stood there and stared at it for a moment as I tried to determine how I could put my own spin on it. I knew that I needed a plant stand and that I had the room for it (we just added a huge back patio a few weeks ago and there area definitely still a few bare spots that need to be filled), but I really wanted to make sure that I knew exactly how I wanted to use it and where it would go! I immediately remembered that I had just placed an online order for this table and I knew that with just a few minor changes I could transform the rack to match. As soon as I got home I began my pink rusty plant stand makeover!
Rusty Plant Stand Makeover Process
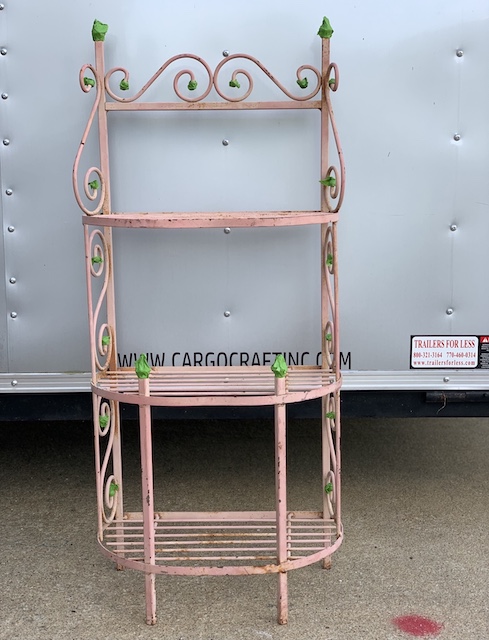
After buying the little rack I went straight home and got to work. I already had all the supplies that I needed at home! I figured that I could knock this out in a few hours! The first thing I did was to tape off all of the ornamental tips on the rack with this painter’s tape.
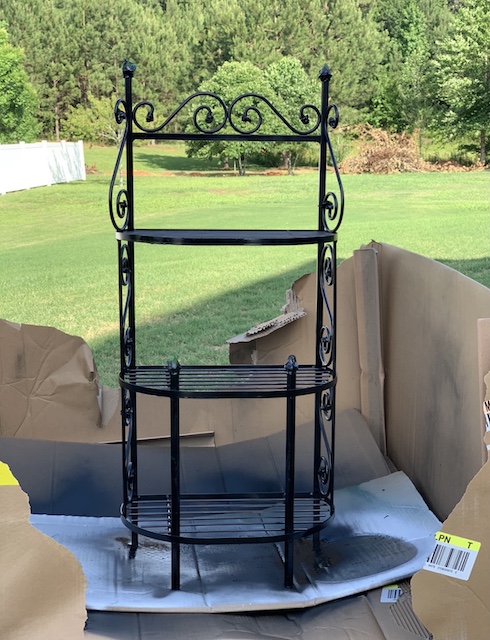
Next I sprayed the rack with this paint. This process was a bit time consuming because it took several coats to cover the entire piece. It is very easy to “miss a spot” because of all of the slats on the rack. I sprayed the front first then I flipped it over and sprayed it from the back side, allowing about 45 minutes to dry in between coats. Even after that, I found that I needed to turn the rack in all sorts of angles to expose all of the spots that were missing paint! Eventually though, I did get it all coated with an even coat of the semi gloss black.
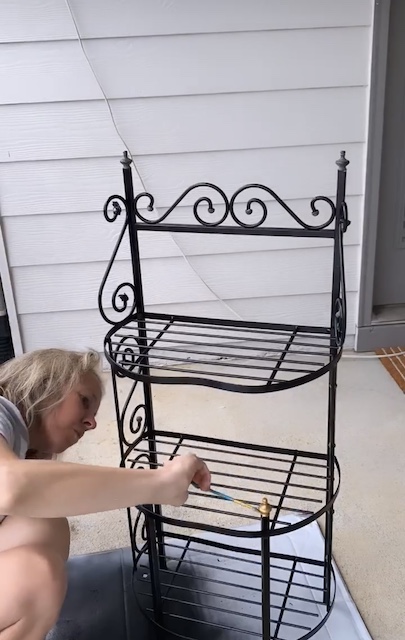
After that, it was time to unwrap the painter’s tape. This also took a while because I had wrapped the ends tight! Once the decorative tips were exposed, I used this product to paint them a nice warm gold color! I would recommend using a nice small stiff brush if you plan to use this in the same way!
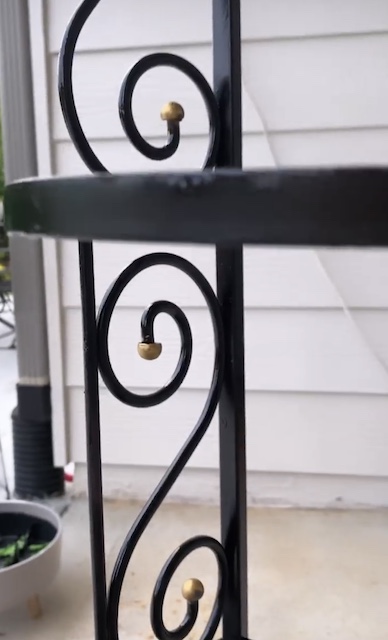
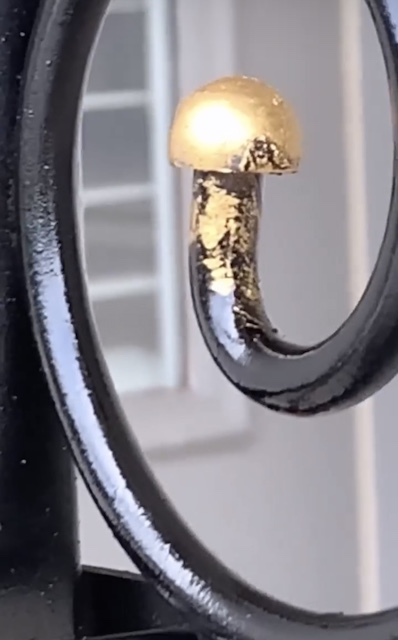
The Rub N Buff dries really quickly but I did notice that I needed to do touch up a few spots with the black spray paint. Not only did I need to touch up where the painter’s tape was but also I found that (because of the flimsy brush that I used) the rub n buff got on a few of the sprayed areas as well. To touch up the black paint a bit, all I did was spray a bit of it onto a disposable plate then I used a small brush to cover any areas that needed it.
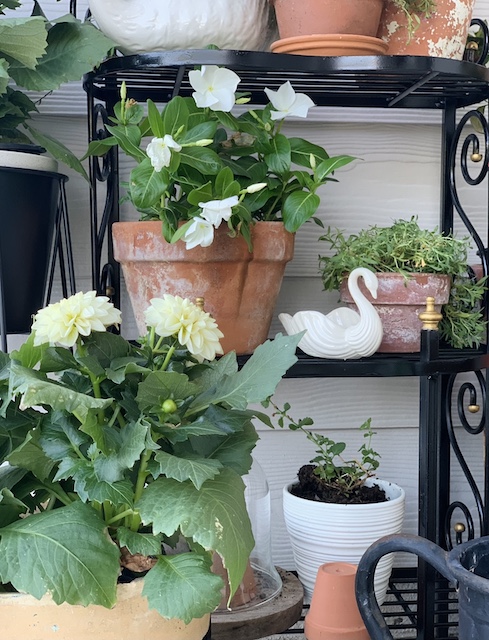
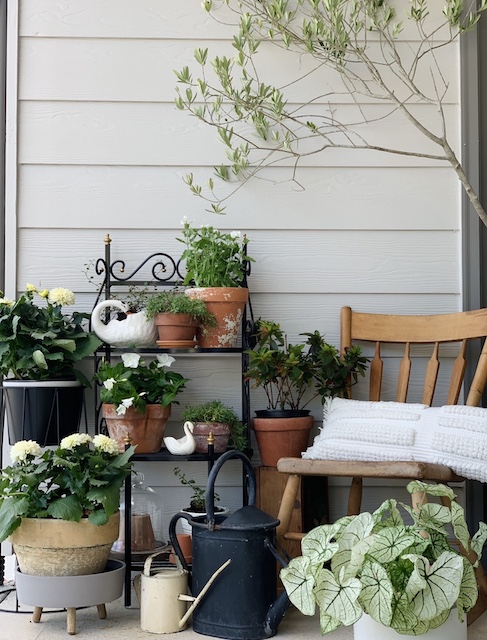
Layering In The Plants And Goodies
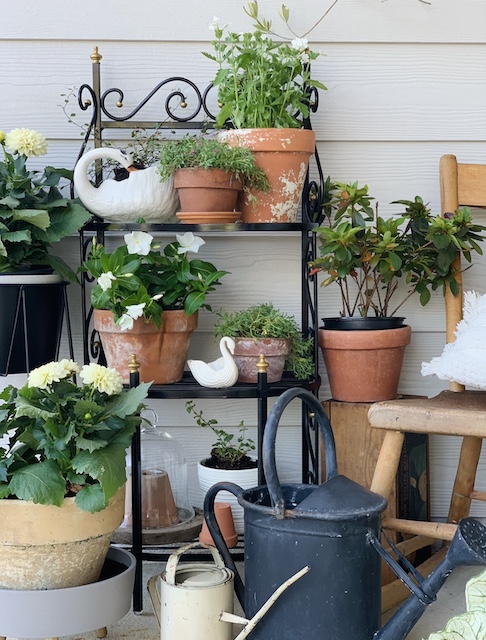
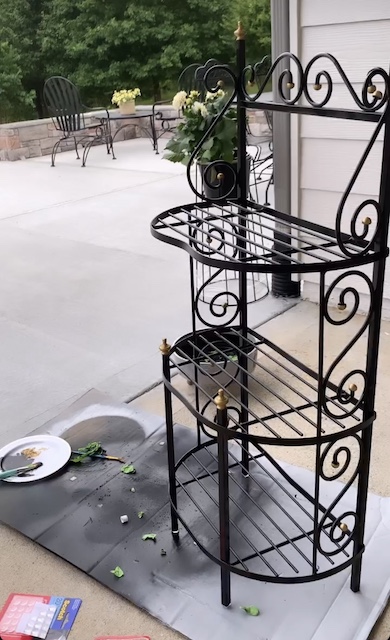
After everything was dried, I got to work decorating my new plant stand! The first thing I decided to do was to use a few flowers that I recently had purchased.
I used:
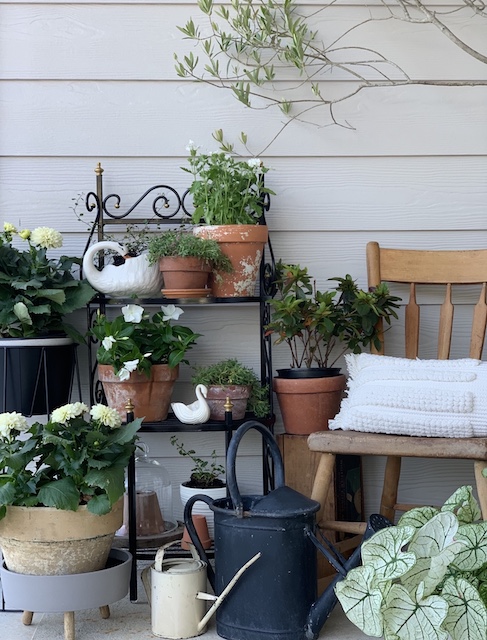
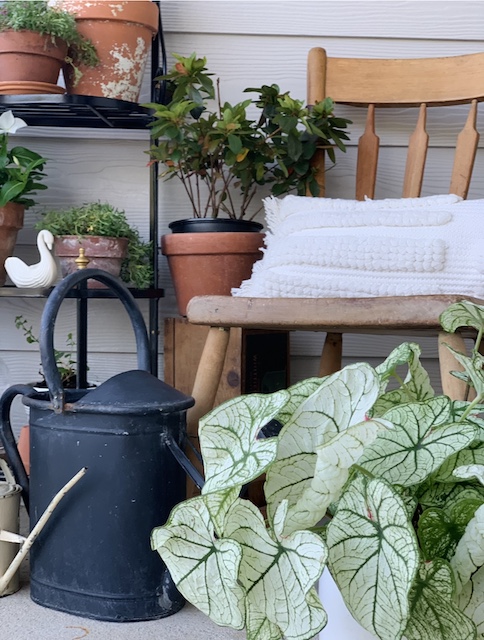
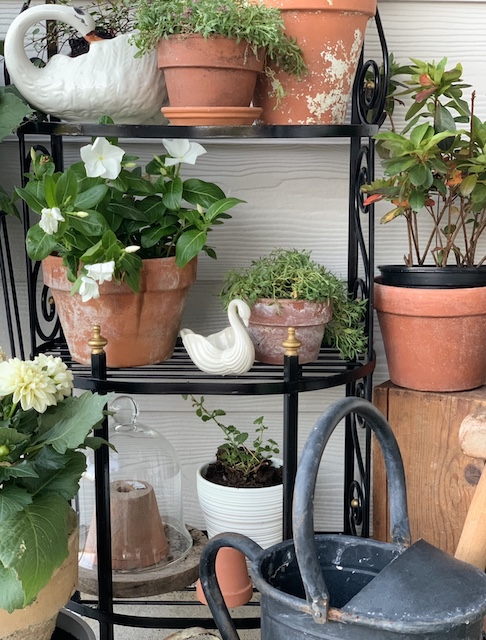
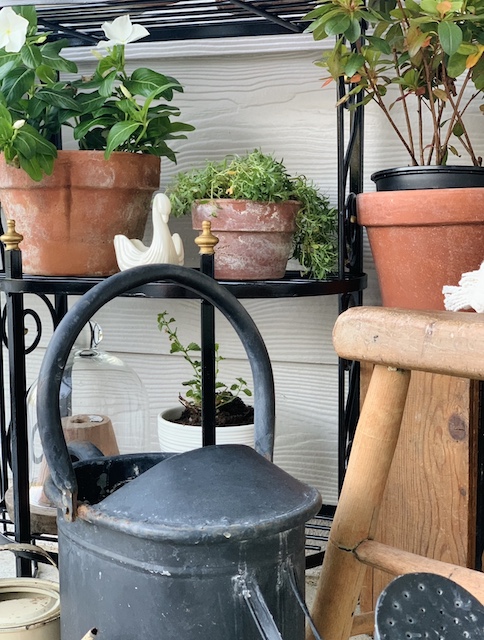
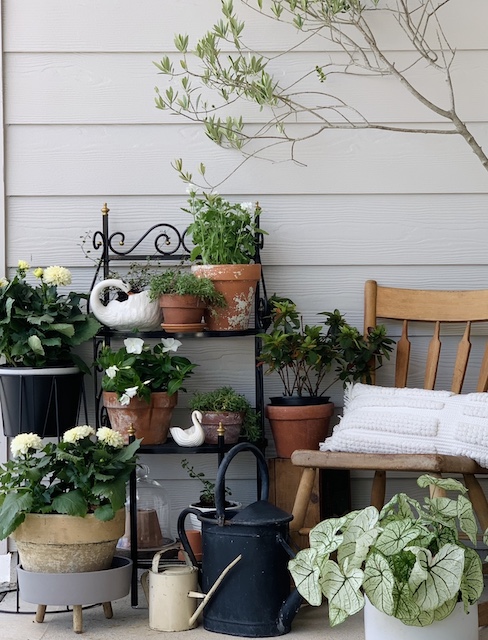
I always like to use a variety of pots when I am grouping lots of flowers and plants together in one space. Of course I always enjoy using all of the different old weathered pots that I have picked up over the years, but I also really enjoyed layering in some of the new pots that I recently purchased here in this space. I really like this one with the little legs that is less than $10.00 and this nice tall one for under $13.00.
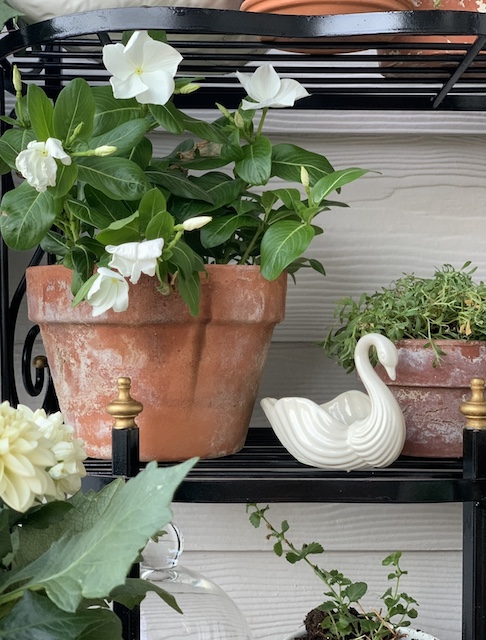
You may have noticed that I also added in some sweet old swans that I got out of my very own antique booth (you can read all about how I like to set my booth up here)! I layered in my little creeping wire vine into the larger planter but I still need to pick up a pixie plant for the smaller swan!

I can not forget to mention the sweet old weathered watering cans that I used. I love to add a good old fashion watering can to any garden area! I think a good watering can add so much texture and warmth – especially in this space!
Recreate This Look
I rounded up just a few items from across the internet just in case you are interested in recreating this look! I even found the exact same rack that I found – but there is only the one, since it is vintage! Remember to check your local thrifts and antique shops too!

Wrap Up
I hope you enjoyed reading about this rusty plant stand makeover as much as I enjoyed doing it. I think it is going to match the new table that is on the way just perfectly – stay tuned for that update! Also, I hope this inspires you to think outside of the box – just grab that spray paint and get to work! Cheers to another little project marked off of the list!
disclosure: affiliate links are used in this post. When you purchase an item through one of my links, I receive a small commission at no additional cost to you. Thank you for supporting My Weathered Home.
 Vintage Christmas Tins: Easy Styling Tips and Tricks
 Santa Mug Shopping
 Fall Flowers On The Mantel
 Vintage Saint Patrick’s Day Decor You Should Be Buying Now


Everything looks like it was made for this arrangement! Beautiful beautiful