Like so many of you, dying Easter eggs is a family tradition that we enjoy doing. This year we tried a new method and it sure was FUN. I am sharing all of the steps below on how to make shaving cream eggs!

We love to dye eggs during the Easter Season and this year our family decided to try a new method! We chose NOT to buy the typical egg dying kits that you see at all the big box stores and instead we decided to dye our eggs using just two ingredients that we already had at home! I was so excited to try this process for the first time and luckily it was very easy! I promise, you will enjoy it too!
Materials
- Eggs
- Shaving Cream
- Food Coloring
- Glass Containers
- Gloves
- Paper Towels

Process
boil your eggs
The very first step is to boil your eggs. If you have never boiled an egg before it is indeed super easy. I simply dropped in a handful of my eggs into a large pot of water and then brought the water. Bring the water to a rapid boil and let them sit in the water for 11 minutes. I removed the eggs from the water with a ladle and let them cool.

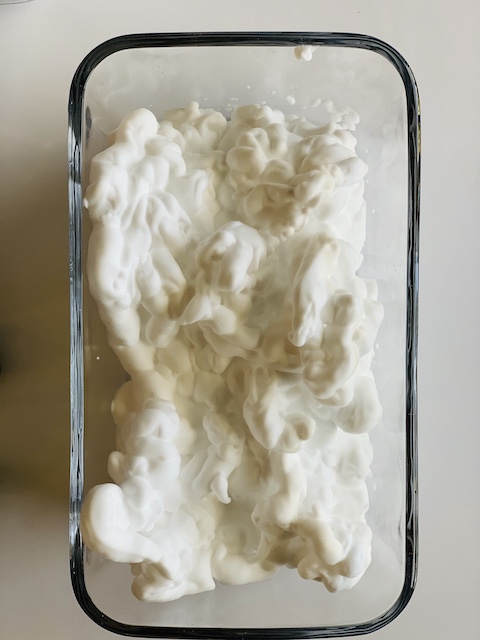
fill your containers with shaving cream
While the eggs are cooling, fill your container with shaving cream. I used a glass pyrex dish for this process. The more colors you plan to do, the more dishes you will need. Note – The glass dish made clean-up very easy!

add your food coloring
Now it is time to add your food coloring. I used this food coloring and just added in a few drops of each color right into the shaving cream. For this ‘batch’ I used green and blue. I just eyeballed the number of drops and then I took a chop stick and mixed it all up!

drop your eggs in the mixture
YUP – that is all you have to do! Just drop your egg in then swirl the shaving cream with a chop stick. Be sure to cover up the egg completely (I used the same chop stick to do that) and then let the egg sit for about 20 minutes.

pull your eggs out
After 20 minutes has past, go ahead and pull your egg out of the shaving cream mixture. Be careful because the food coloring will dye your hands. I used a rubber glove to protect my hand but you could also use a set of tongs to pull them out.

wipe off the excess
After pulling the egg out, I wiped off all of the excess shaving cream with a paper towel. To be honest, it took MANY paper towels to get all of the shaving cream off. And, it was kind of messy! Be prepared for that. But it is totally worth it, the results are amazing!

let them dry
After getting off all of the shaving cream, let your eggs dry for about a half an hour. I recommend that you test the egg to make sure it is dry before you style it. The drying time will vary and you don’t want to accidentally get food coloring on anything.

style your shaving cream eggs
I was very pleased with the way these all turned out and the best part is that it was very easy! I decided to style them right inside this little ceramic bunny stand that I recently picked up. (You can see more of my favorite vintage Easter decor here.)
I felt that these bright colors would work well with some of my vintage Gurley candles too. You can put them anywhere you have an Easter display, they add a wonderful pop of color. The mixture of colors really remind me of Spring and are a great way to kick off the season.

Wrap Up
I am already looking forward to doing more of these and if you haven’t already tried dying Easter eggs with shaving cream then I highly recommend that you try it! Happy Easter!


 Cut Flower Garden In A Raised Bed
 Simple Spring Back Porch And A Mother’s Day Reflection
 Gurley Flower Candles On Display For Spring
 Borax Crystal Hearts: For Valentine’s Day


Wondering if you Could rinse the shaving cream off with water or would that dilute the color?
Mark asked me the exact same question. I need to try that and see. I have a feeling it will really take some of the color away though!