I have a confession to make! You may not believe this but I just got my very first large cloche a few weeks ago. This thrift store beauty was only $10.00 and I knew that I could use this spring season! Let me show you how I came up with (what I think) is the perfect simple spring garden cloche!
How It Started
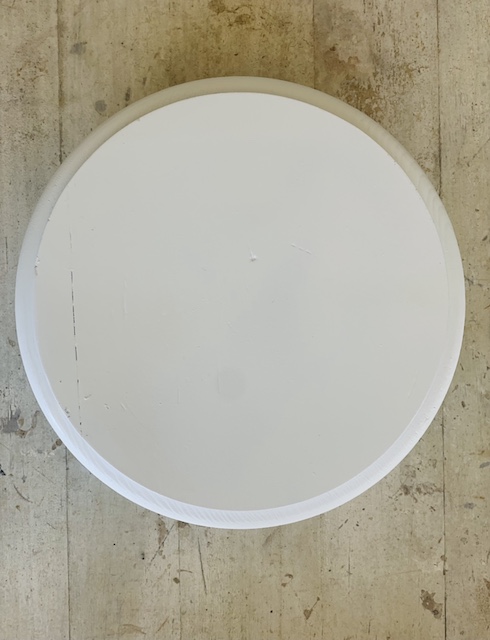
When I got this cloche the base was actually a dark wood color. My initial thought was that it was a little too dark for the spring season so I decided to lighten it up with a can of white spray paint.
While I knew that I wanted my cloche to correlate with the season that we are currently in (spring), I wasn’t exactly sure what direction I wanted to go in. I knew that I wanted it to be cheerful and fun but also I wanted it to be something that would easily fit into my home right now.
With that in mind, I headed to the shop (I have a little antique booth at a local antique shop) and decided to walk around and shop for the inside of my newly white cloche. I wanted to see if anything there at the shop would jump out at me … I was there looking for a little inspiration and direction.
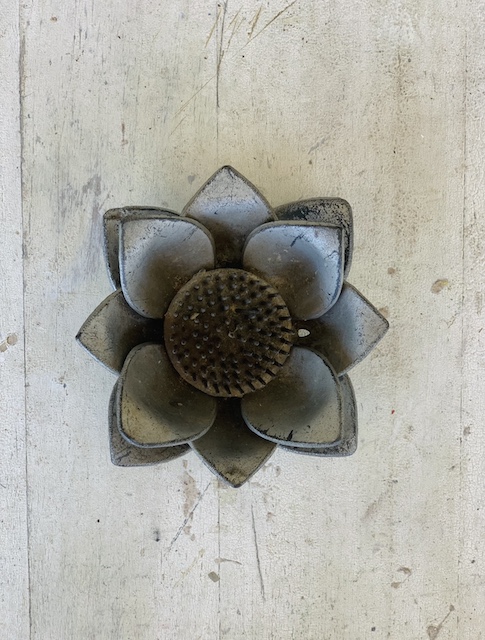
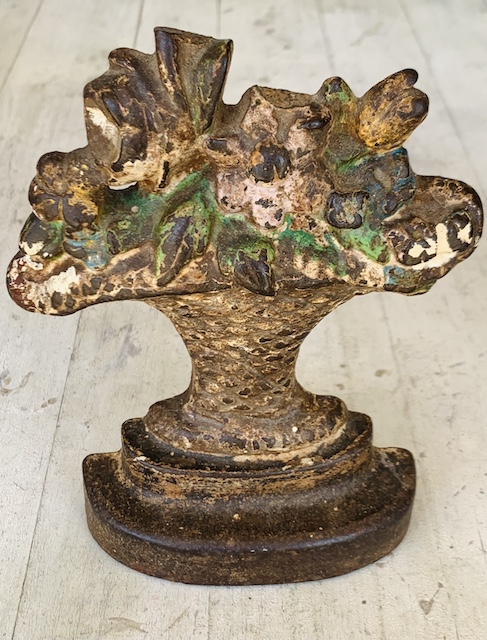
I had been shopping for about 15 minutes or so when all of a sudden …. I saw it! THE INSPIRATION I was looking for was right there in the bottom shelf of the sweetest booth. A lotus flower frog, something I didn’t have but had been casually hunting for, was just sitting there waiting for me.
After finding that piece, I knew that I wanted to create a ‘spring garden’ themed cloche and so I shopped around the store for other spring garden items that I thought would complement my flower frog. (I documented the entire process over on my IG stories. You can join me on Instagram if you want to see more content like that.) After collecting a small pile of goodies for my simple spring garden cloche on the store counter, I went home and got busy.
What I Used For My Simple Spring Garden Cloche
Pieces From The Shop
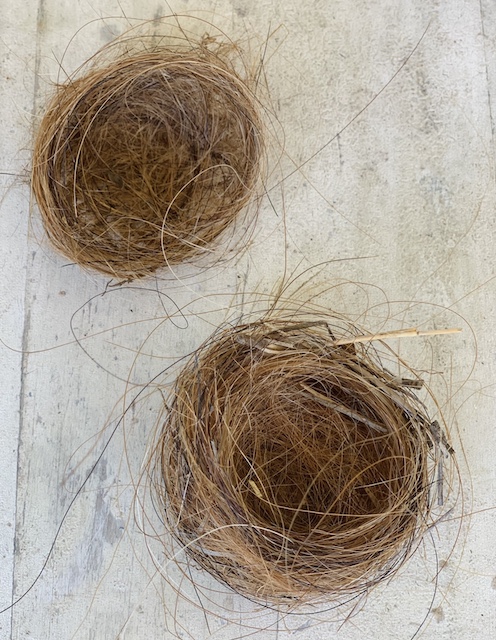
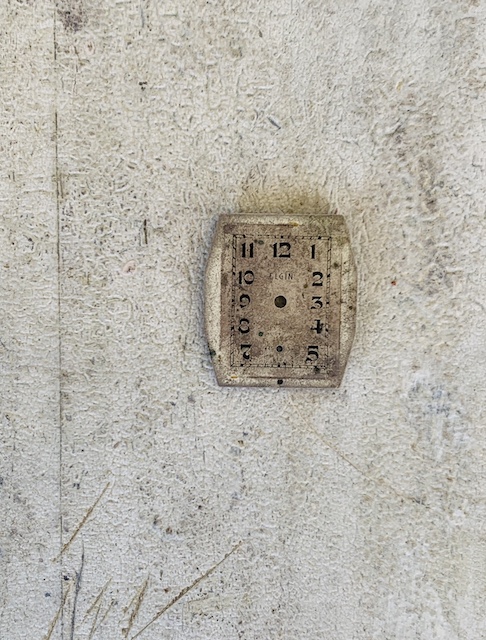
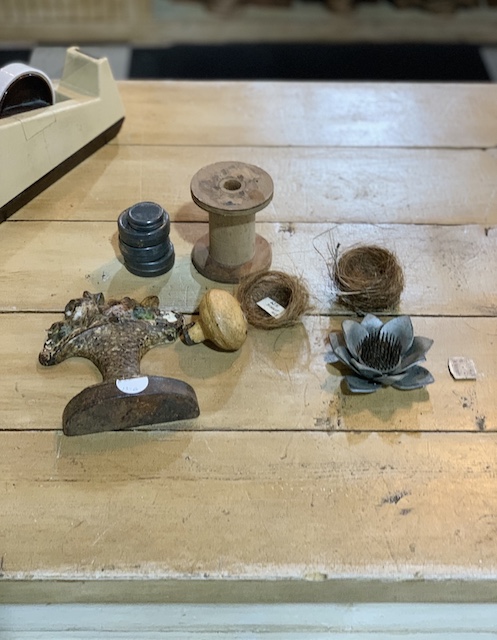
I was able to find several great items at the antique shop including the coolest little, old horsehair birds nests! The chippy door stop was a great find and I was happy to find another since had another similar one here in my home. (I also got a pile of little tins, which i didn’t include above – but I did use them.). With these items in mind, I then decided to shop my house for a few more items that I thought would complement these items above.
Pieces From Home
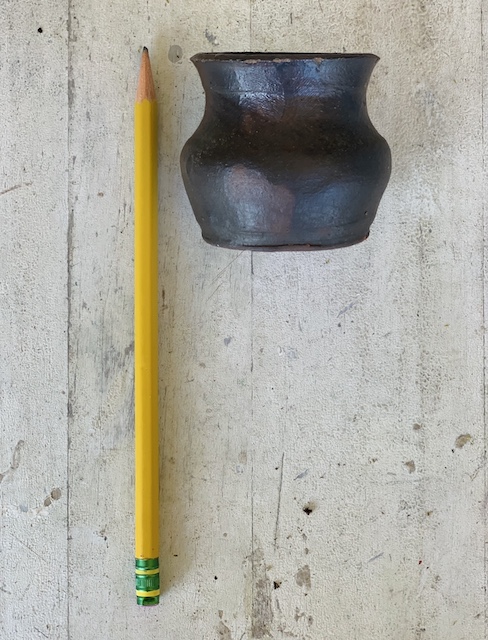
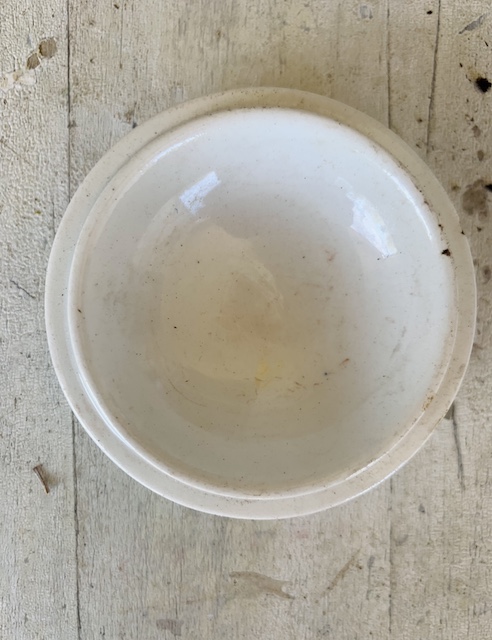
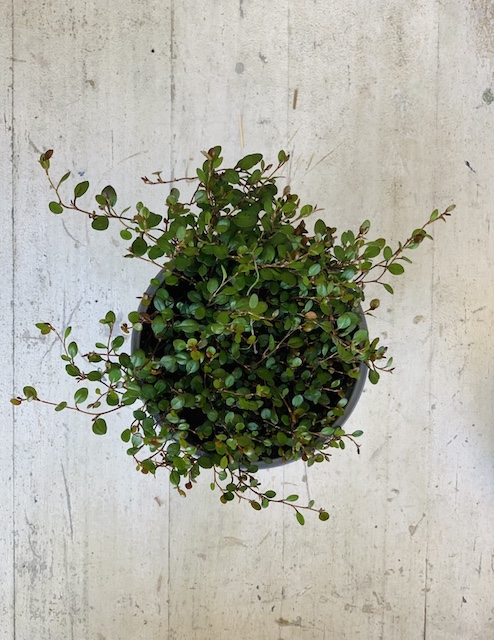
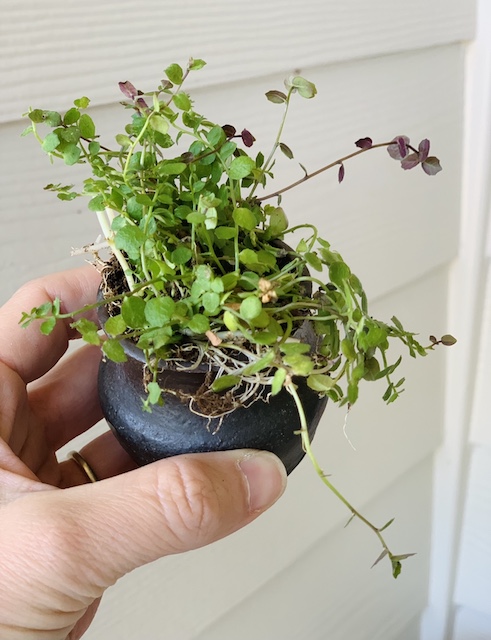
I really only needed a few ‘filler pieces’ from around my house since I found my WOW pieces at the shop, so I simply grabbed the little brown pot and a little vintage white ceramic that I had laying around which I plan to fill with this really cute ground cover plant that I got at Home Depot. I also plan to use a few eggs to fill the birds nest!
Let’s Build The Cloche
Now that we have all of our materials it is time to actually assemble to cloche! I am listing my steps below:
Clean Your Glass
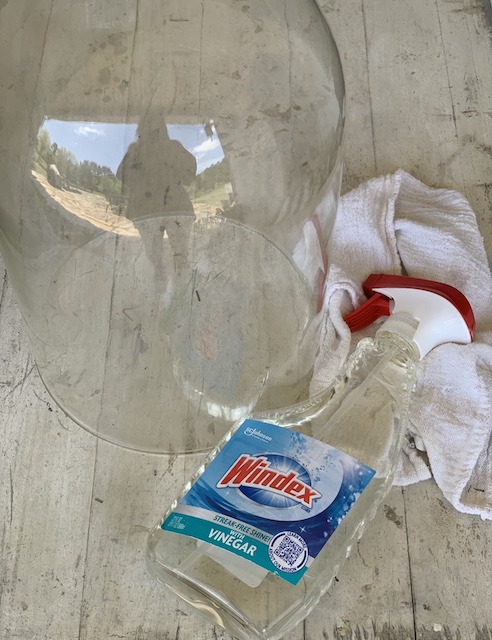
After being at the thrift store, the glass of this cloche was very dirty! It only took me a few seconds to clean it up to ensure that we could really see what we put inside!
Cover Your Base
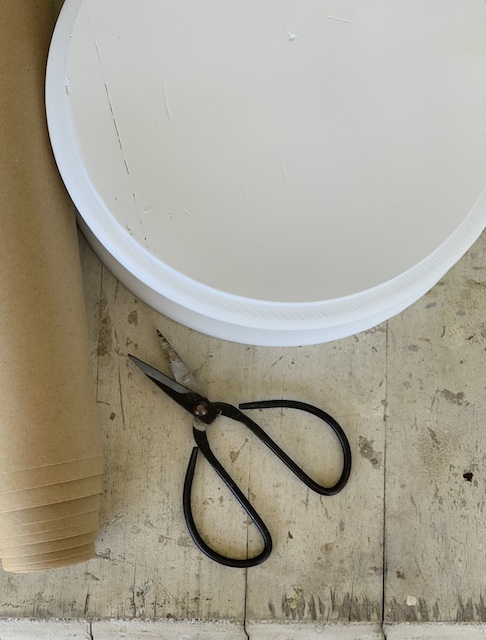
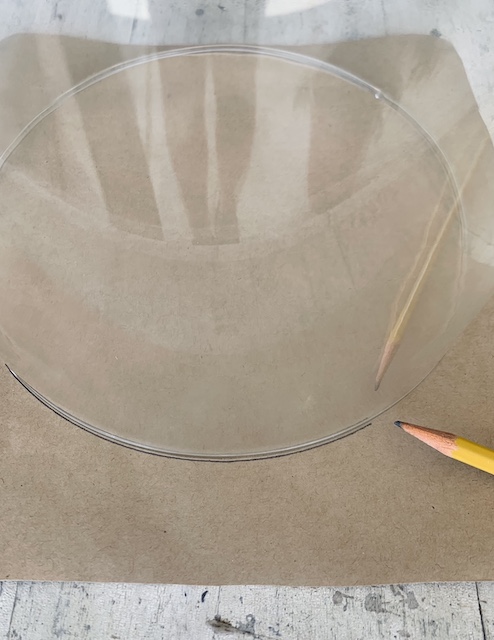
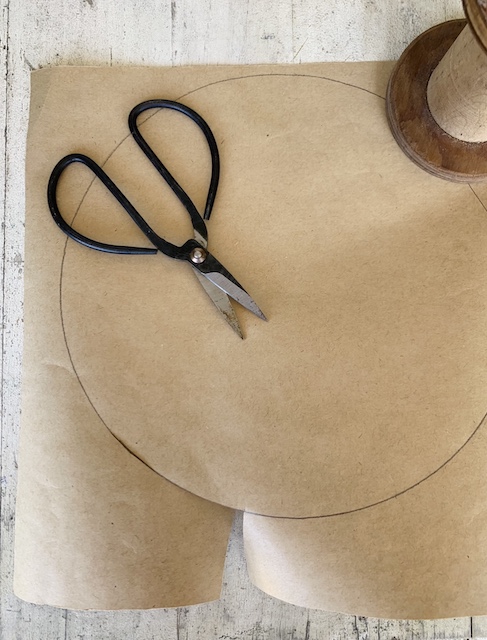
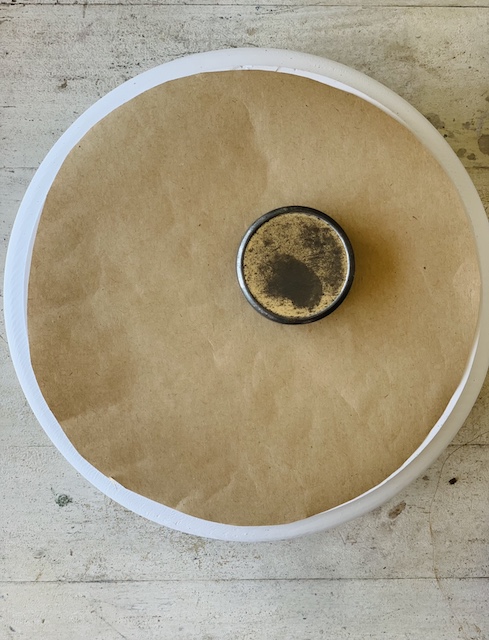
I wanted to be sure to keep the cloche base clean and in an effort to do that I cut out a ‘liner.’ I knew that I would be using potted plants with soil that could fall (as well as rusty old items) so I felt that lining my base with a little craft paper would help to preserve the white base!
Time To Assemble
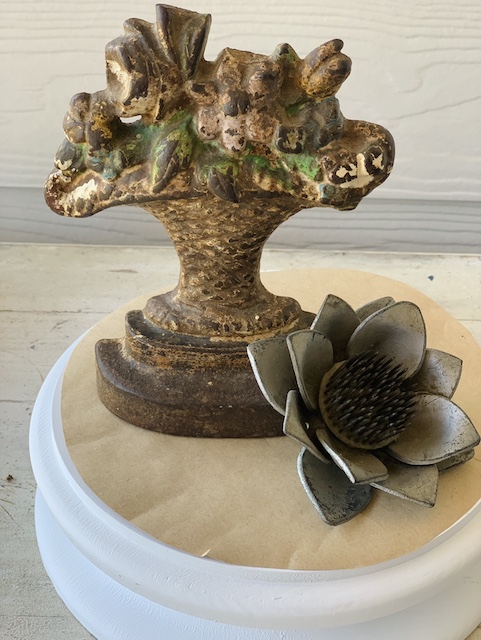
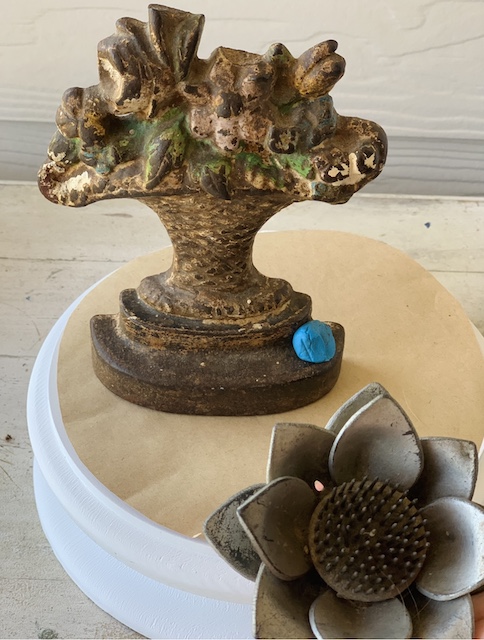
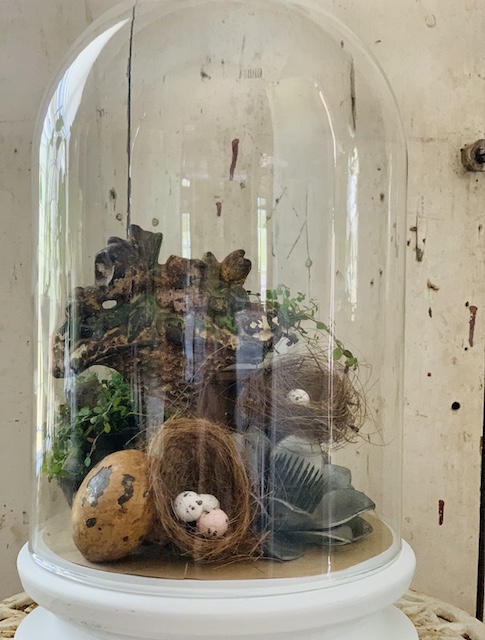
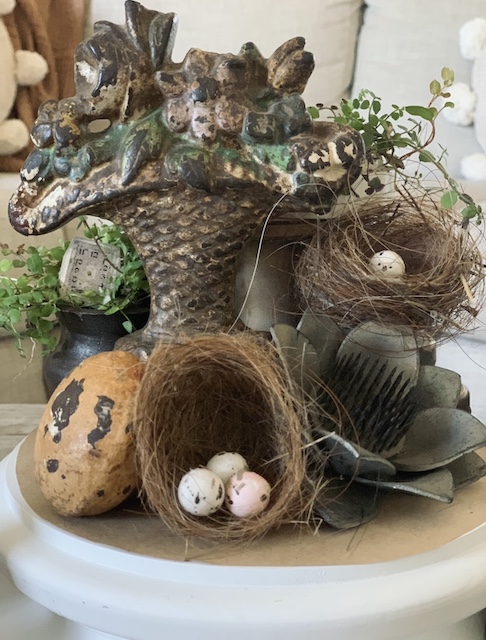
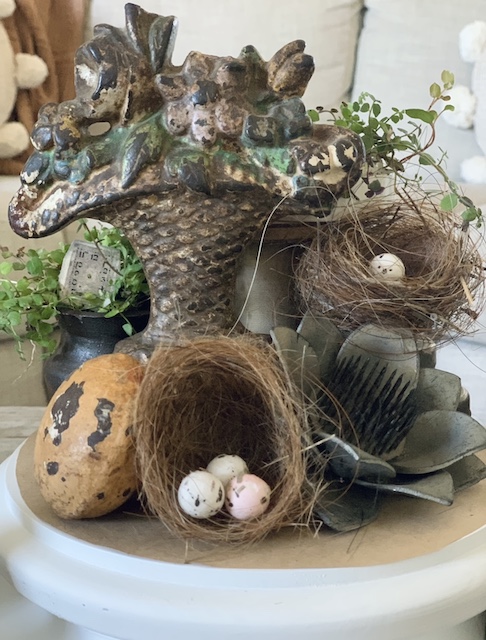
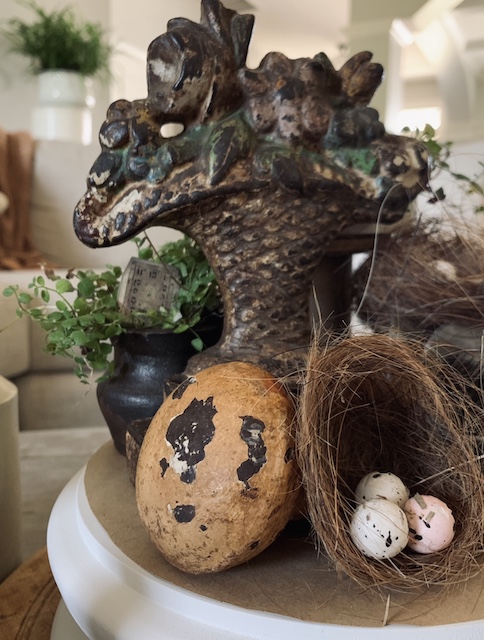
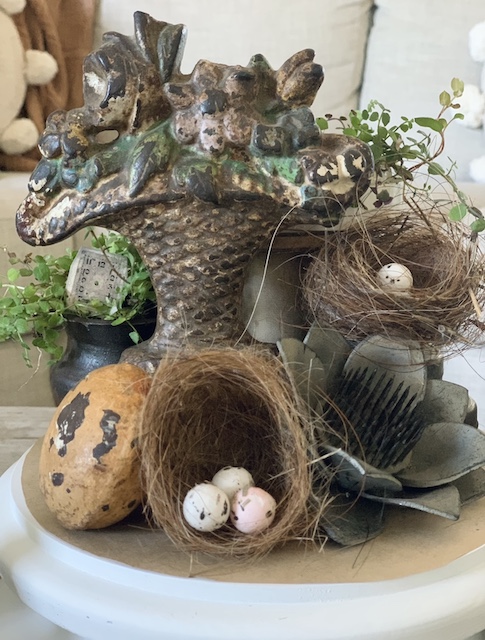
- I place the door stop just off center and then layered the flower from beside it. I used this product (which is just a few bucks) to help keep the flower frog from sliding down.
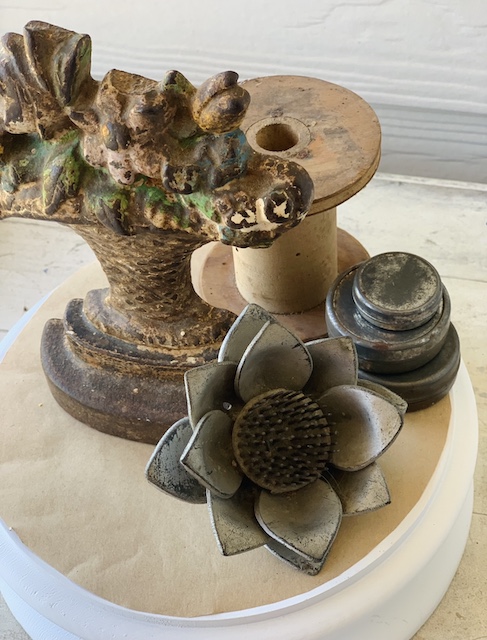
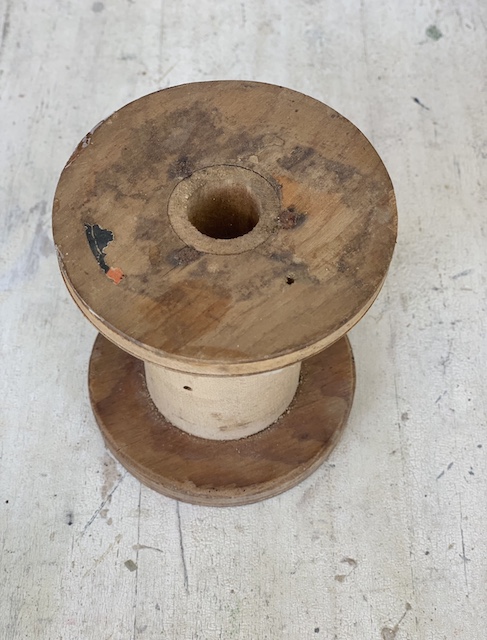
2. Next I layered in the tiny tins and the spool. I used these pieces here to add height behind the flower frog. I was sure not to go any higher than the door stop – as I wanted that to be the main focal point.
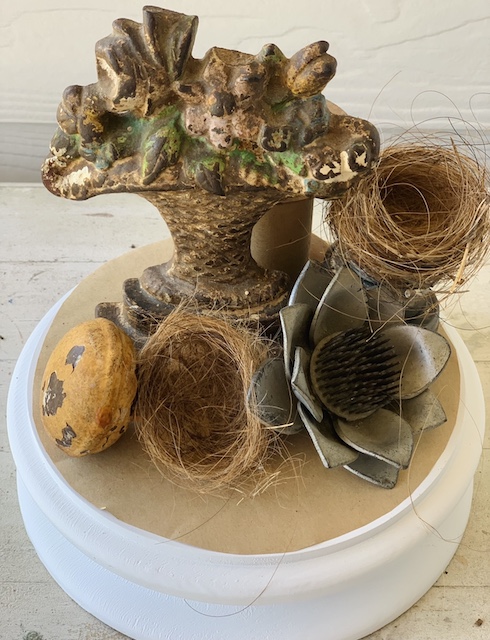
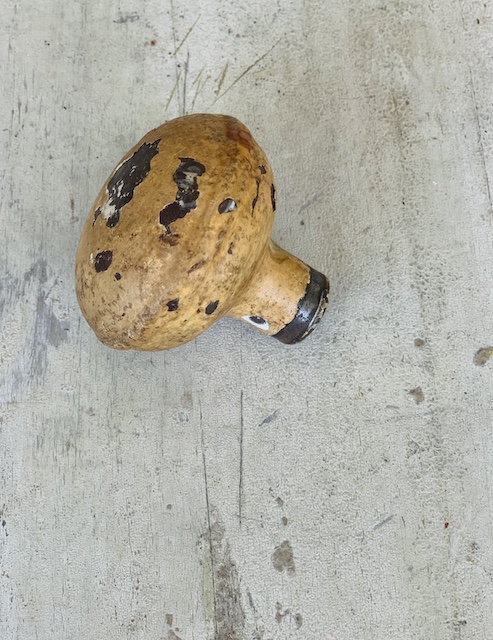
3. I then layered in the smaller items. I used the birds nests because they really do exemplify the spring season but they also add texture. I chose to use the door knob here because the colors and the rust echo the door stop!
4. Next I added in a little bit of greenery here and there.
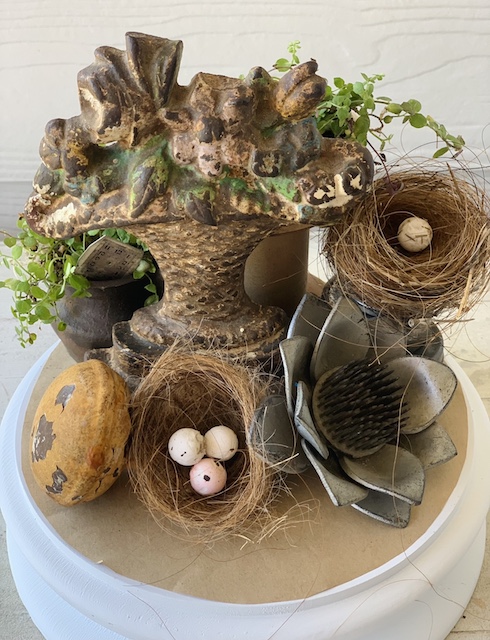
5. The last touch was adding in the eggs into the nest. Here I used eggs that were in a faux nest that I got at Michael’s several years ago! I just pulled them out of that nest, peeled off the hot glue, and then gently placed them here.
Time To Style The Simple Spring Garden Cloche
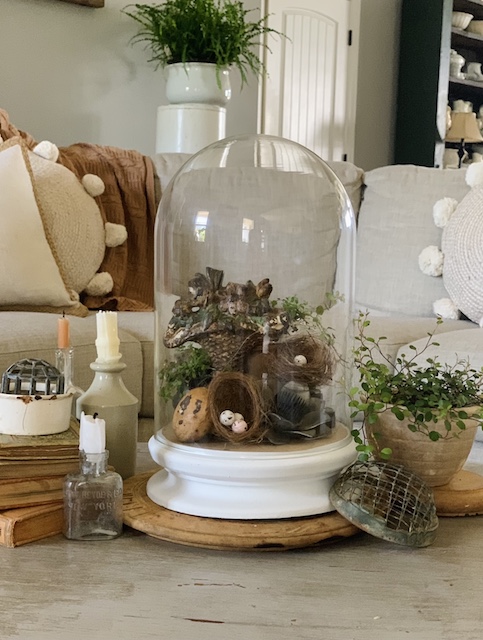
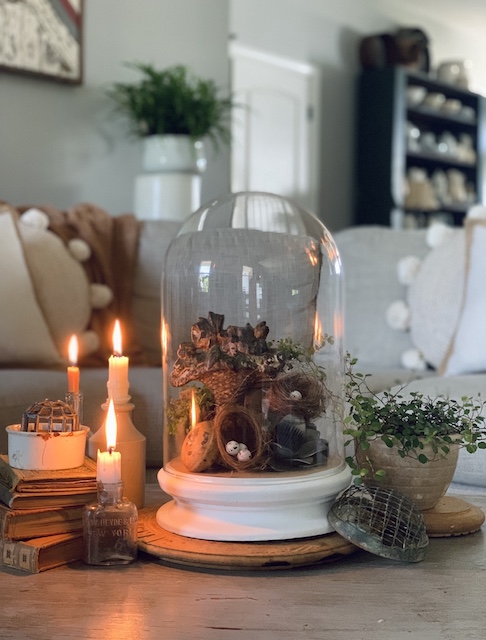
This is always the best part for me – finding the perfect spot for things like this. I decided to put my simple spring garden cloche on the coffee table here in our living room. I piled a few fun pieces around it and called it a day!
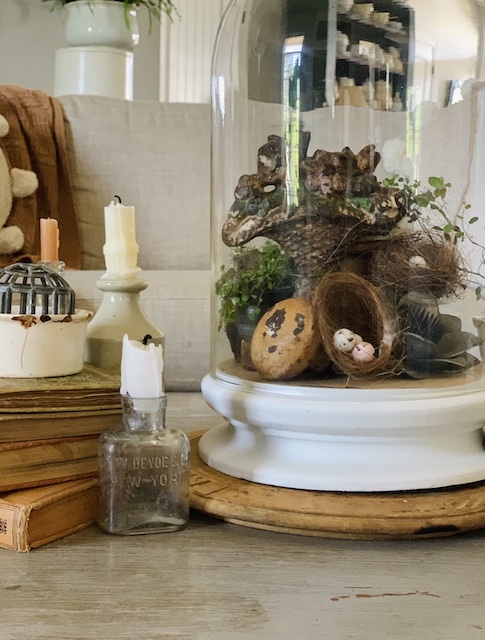
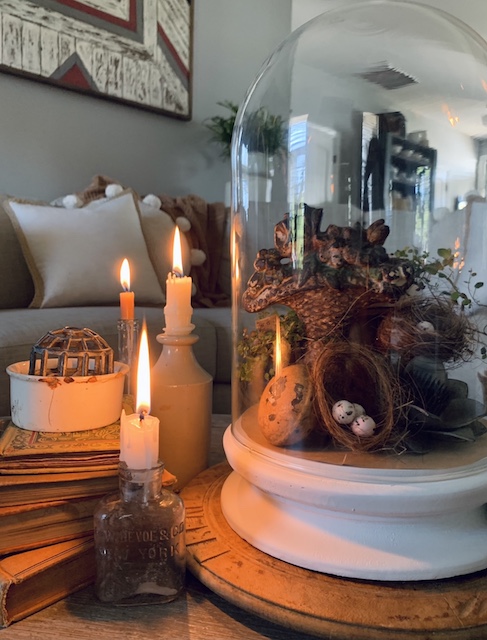
I went ahead and took the glass off so that we could see all of the pieces of the cloche more easily.
Here it is with candle light!
Recreate The Look
Here are a few cloche options for you to choose from in case you want to create your own!

Here are a few things that you can use to recreate my look!
Wrap Up
I am so glad you took a moment to read about how this simple spring garden cloche came to be! I hope it reminds you that sometimes just ONE PIECE can be the ‘jumping off point’ for an entire area! Happy Spring to each of you!
 Vintage Christmas Tins: Easy Styling Tips and Tricks
 Santa Mug Shopping
 Spooky Vintage Halloween Shelves
 New Kitchen Tile Backsplash Update

